# Knowledge Base
### About Sphere
[Sphere](https://www.getsphere.com/) is an AI-powered global tax compliance platform.
We help companies like Runway AI, Weaviate, Codeium (and many more) automate their sales tax, VAT and GST compliance obligations around the world.
Specifically, we provide functionality for:
* **Monitoring**: We help you monitor your indirect tax exposure around the world
* **Registration**: Manage all registrations with tax authorities around the world through one platform
* **Calculation**: Calculate and collect tax at the point of transaction (in invoices or at checkout)
* **Filing / Remittance**: Submit compliant filings with global tax authorities and remit tax payments on time, every time
### Jump right in
# Quickstart
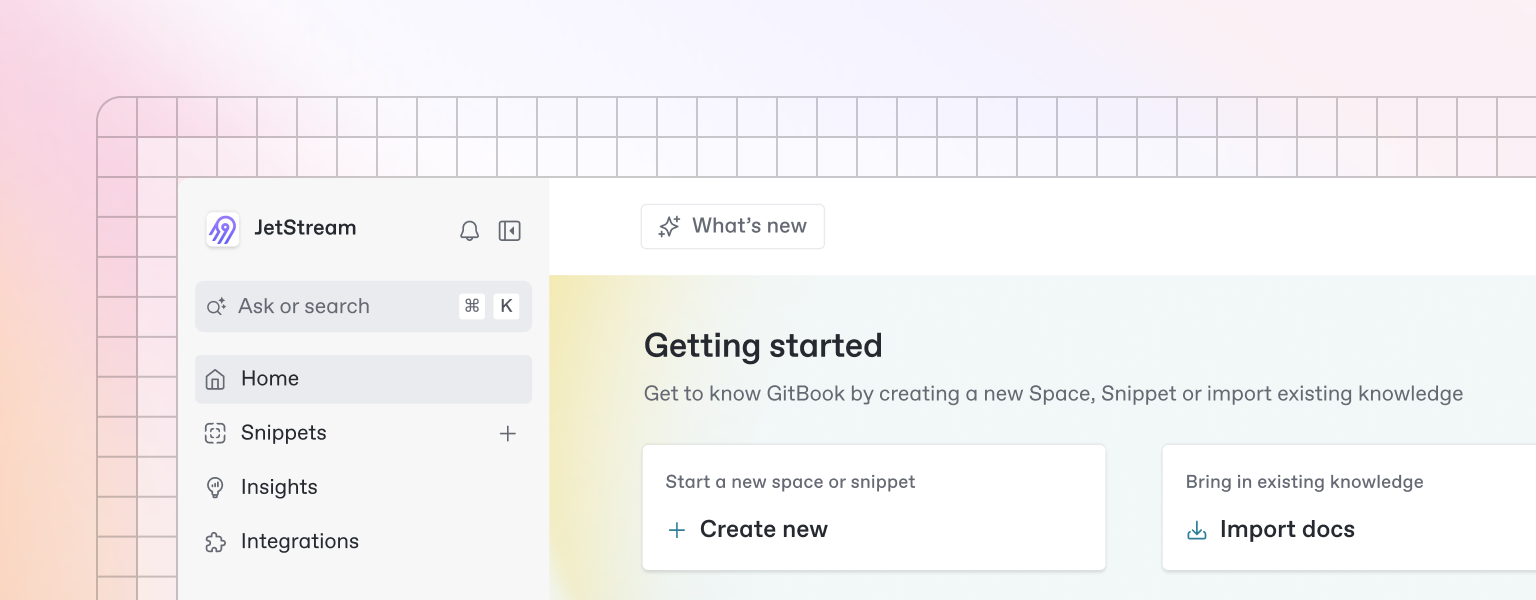
Beautiful documentation starts with the content you create — and GitBook makes it easy to get started with any pre-existing content.
{% hint style="info" %}
Want to learn about writing content from scratch? Head to the [Basics](https://github.com/GitbookIO/onboarding-template/blob/main/getting-started/broken-reference/README.md) section to learn more.
{% endhint %}
### Import
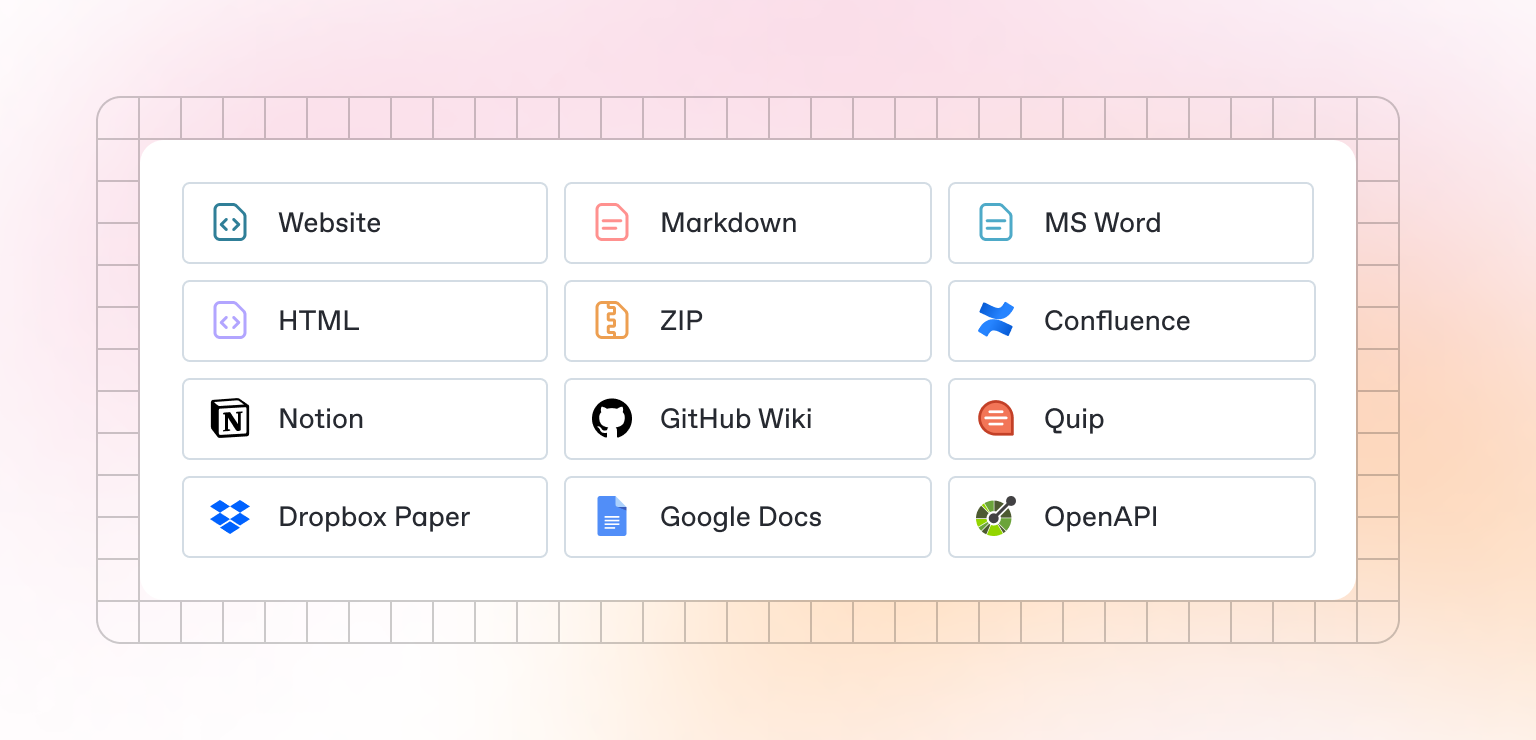
GitBook supports importing content from many popular writing tools and formats. If your content already exists, you can upload a file or group of files to be imported.
### Sync a repository
GitBook also allows you to set up a bi-directional sync with an existing repository on GitHub or GitLab. Setting up Git Sync allows you and your team to write content in GitBook or in code, and never have to worry about your content becoming out of sync.
# Publish your docs
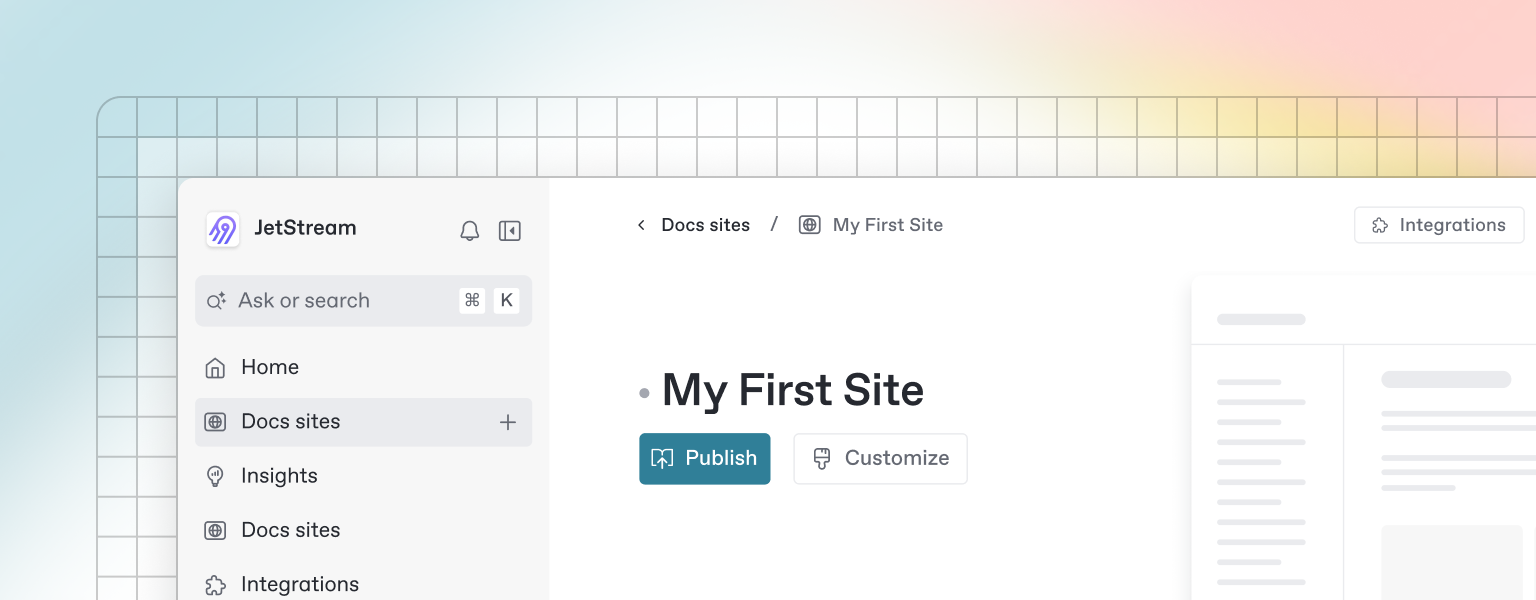
Once you’ve finished writing, editing, or importing your content, you can publish your work to the web as a docs site. Once published, your site will be accessible online only to your selected audience.
You can publish your site and find related settings from your docs site's homepage.
# Monitoring
Monitoring allows you to keep track of your global tax exposure so that you can form a plan around becoming compliant.
{% embed url="" %}
Walkthrough of the Monitoring feature in Sphere
{% endembed %}
## Overview
Our Monitoring feature extracts data from both your billing and HRIS provider to give you a view of where you are exposed around the world from an indirect tax compliance perspective.
We sync your data on a daily basis so that your exposure is kept up to date vs having to pay for expensive, periodic nexus studies from tax advisors / accountants.
We explain below the key items and concepts that constitute the Monitoring feature below.
## Regions
A region is anywhere you register and file for indirect tax:
:flag\_us: **United States**
* Each individual state is a region
* Home rule states (like CO, AZ, AK, LA, AL) count as one region each as we file via a centralized system
* The only state which requires multiple registrations is Illinois as Chicago has a seperate form of indirect tax (specific to software) called the PPLTT which requires its own registration / filing.
:flag\_ca: **Canada**
* GST / HST (federal level tax) = 1 region
* PST (provincial taxes in British Columbia, Manitoba, Saskatchewan, Quebec) = each count as 1 region as they require seperate registrations / filings.
:flag\_eu: **Europe** = 1 region as we file via the One Stop Shop scheme (which allows us to report all EU transactions and tax via 1 member state)
:earth\_americas: **Rest of World** = typically each country is 1 region (although there are exceptions)
***
## Nexus
An entity is generally subject to a region’s sales and use tax requirements if that entity has ‘*nexus*’ with the jurisdiction. Generally, nexus is the minimum necessary connection that an entity has with a region that allows that region to impose a tax or, in the case of sales and use tax, a collection obligation on that entity (nexus is largely equivalent to the VAT concept of “permanent establishment”).
Nexus is generally obtained, or triggered, by either a physical in-state presence or an economic presence.
### Physical presence
A physical presence can be triggered by several factors, including the presence of property or payroll in a region. Property, for example, can be considered as maintaining an office, warehouse, distribution center, or a manufacturing plant, whether leased or owned. Property can also be considered as maintaining, using, or storing fixed assets or inventory. Payroll can be considered as maintaining employees or independent contractors, whether full-time, part-time, or temporarily in the region.
Sphere integrates with your HRIS provider to track your FTEs and contractors around the world to see where you have physical presence. This is denoted in the *Physical Presence* column in the Monitoring feature.
Physical presence column in Monitoring
### Economic presence
An economic presence can be triggered by maintaining a certain sales volume within a region, based on customer location. This sales volume is typically measured by either a gross sales volume (measured in local curency) or a transactional sales volume (measured by count of sales transactions), on an annual basis. Though it can vary greatly from region to region, the typical threshold for an economic presence in the US is $100,000 or 100 sales transactions over a calendar year period. There are some regions that maintain a higher gross sales volume threshold, maintain no sales transaction threshold, or measure their determination period on a rolling annual basis.
Sphere keeps track of all of these economic thresholds globally and integrates with your various billing systems to track where you are approaching or have breached these thresholds.
If a region has an *Approaching Exposure* status (see definitions [below](#monitoring-statuses)), we will show you your progress towards the threshold via the *Nexus Tracker* column. Note that *Volume ($)* and *Volume (#)* denotes volume over a specific determination period that is specific to the region (this can be the prior calendar year, rolling last twelve months etc).
Economic nexus calculation and tracking in Monitoring
### Tax liabilities
If your product is taxable in a region and you breach either economic or physical nexus, you will start accumulating a tax liability from the day you first breached nexus.
Sphere provides you with the exact date where you breach nexus and calculates the tax liability you owe from that date (via the *Nexus Triggered Date* and *Estimated Tax Liability* column, respectively).
{% hint style="info" %}
Note that the *Estimated Tax Liability* column **does not include** the following additional costs:
* Late filing penalties - these can be either a % of the tax liability or a flat fee per filing
* Interest on tax liability - usually % applied to the tax liability which compounds over time
{% endhint %}
## Monitoring statuses
Each region is assigned a Monitoring status based on your exposure in that region:
Status
Explanation
No sales in the region
You have breached economic or physical nexus
Your products are NOT taxable in the region
Technically you are meant to register and file $0 returns in these regions but a lot of businesses opt not to as there is NO tax liability associated with the region
You are approaching the nexus threshold (we will provide a progress bar that shows how close you are to breaching the threshold)
Your products ARE taxable in the region
We suggest registering once you pass 60% exposure in these regions OR you know you will hire someone in the region in the next month
You have breached the either economic or physical nexus and are accumulating a tax liability
Your products ARE taxable in the region
We suggest registering in these regions ASAP as you will both need to pay the liability + associated penalties and interest
You have registered in the region but you have NOT enabled auto filing
You have registered in the region and HAVE enable auto filing
# Registration
Registration allows you to register for any region globally all through the Sphere platform
{% embed url="" %}
Walkthrough of the Registrations feature in Sphere
{% endembed %}
## Overview
Our Registration feature allows you to apply for new registrations in regions across the world or submit your existing registration details so that Sphere can manage your account for you.
Below we step through both new and existing registration flows.
## **New registrations**
Sphere has gone through the registration requirements for each tax jurisdiction and has compiled all data required in its native registration forms.
Every region will have different requirements and so forms may look a little different. That said, there is also significant overlap between forms - to help streamline registration, we prepopulate answers from prior registration forms that you've completed so that you don't have to fill out the same information every time.
New registration forms are prepopulated with answers from prior registrations to save you time.
{% hint style="info" %}
*Note: Many countries outside of the US offer a simplified GST / VAT system for digital services companies. Currently, Sphere only supports these simplified GST / VAT systems vs the general system in those countries. The limitations of these simpified systems tends to be that they don't allow you to claim input tax for expenses you incur in the region.*
{% endhint %}
Once you submit a new registration, you will either need to:
**a.) Complete some next steps** - if you need to complete a next step an 'Action Required' status will appear next to your registration in the 'Subscribed Registrations' table and you will receive email reminders until the tasks are complete.
'Action Required' status means you need to complete steps associated with the registration
If you click on a region with 'Action Required' status you will see the steps you need to take to activate the region in the top right hand corner of the page.
**b.) Wait for your registration to process** - this means there are no next steps for you and the registration will have a 'Processing' status in the 'Subscribed Registrations' table. You just need to sit tight and Sphere will let you know what to do next! You will be sent an email notification once your registration becomes active or we need something from you.
'Processing' status means that Sphere is in the process of submitting your registration to the relevant tax authority
## **Existing registrations**
If you are already registered in a region, all you need to do is link Sphere to your tax account.
We make this easy for you by either requesting the relevant details Sphere needs to request access OR giving you instructions to provide access to Sphere.
Provide registration details
Similar to the New Registrations process, once you provide the necessary details to link Sphere to your account there may be some additional steps you need to take. If there are additional steps, the region will have an 'Action Required' status (as described in the New Registration section above).
## Autofiling and Tax Calculations
Once your region becomes active on Sphere:
* **Autofiling** - will be turned on for the region by default; this means we will automatically generate filings for this region two weeks before the filing due date.
* **Tax Calculations** - needs to be switched on if you plan to use Sphere as your real-time tax calculation provider. If you are using an alternate tax calculation provider, make sure this is switched off for the region.
You can switch on / off both Autofiling and Tax Calculations on each respective region page.
You can turn Autofiling and Tax Calculations on / off on each region page.
# Calculation
Real-time tax calculation allows you to instantly add the correct tax to each transaction.
**Overview**
Sphere has built it's own AI-enabled tax engine that is able to instantly calculate the right tax to apply at the point of transaction (e.g. invoices, checkout).
There are two key things that our engine needs to calculate tax correctly:
1. *The product being sold and whether its attributes are taxable in the region its being sold into*; this is know as the **Tax Determination**
2. *The address of the customer*; which not only impacts taxability but the **Rate** that must be used
We've provided more details on both these concepts below as well as how we integrate our tax engine into the billing flows of our customers.
### **Tax Determination**
{% embed url="" %}
Walkthrough of the Tax Determination feature in Sphere
{% endembed %}
In order to accurately assess whether your product is taxable in a region we need to understand the various attributes of your products that could impact its taxability.
When you onboard onto Sphere we pull in all your products from your billing systems and ask you to assign a Product Tax Code to each.
The Products feature allows you to assign Product Tax Codes to each of your products
To assign a Product Tax Code, we ask a series of questions which capture the key taxability characteristics of your product. At the end of the questions, a Product Tax Code is suggested.
Questions are asked to determine the taxable characteristics of your products
Sphere has created a taxonomy of Product Tax Codes for each key region globally. We then map this taxonomy to the tax law in that region and how that region would tax the various attributes that are contained in a particular Product Tax Code.
Traditionally, tax software vendors have done this mapping process manually which leads to errors and the mapping going stale as legislation changes. At Sphere, we've indexed the indirect tax legislation of every key economic region to not only map our taxonomy but to monitor the legislation for ongoing changes. This means global coverage for our customers that is always kept up to date to ensure you are always in compliance.
Note that our in-house tax experts **always review and verify** the mappings that our AI system produces to ensure that outputs are accurate.
### Product Tax Codes
After you've assigned your Product Tax Code, you'll see it in the Tax Code column of the Products tab, followed by a label explaining the category.
Using the below example, `62/MS-01 - SaaS - Business Canned ...` the Tax Code is `62/MS-01` followed by a descriptive label that defines the category the product is in. In this case, `SaaS - Business Canned Software` , `Mississippi`
The Tax Code itself is a number, optionally followed by one or more `/`-separated modifiers that capture region- or attribute-specific variations — for example `62`, `62/NJ-02`, or `62/NJ-02/MB-02`.
You can copy the Tax Code from this page, or via the export button on the same page which will send you an email attachment with the Tax Code as a column.
| Product | Tax Code |
| ---------------- | ---------- |
| Starter Plan | `62` |
| Growth Plan | `62/NJ-02` |
| Enterprise Plan | `63/IL-01` |
| Analytics Add-on | `67/MB-02` |
### Best practices around Product Tax Code assignment
Below are a number of best practices that we advise companies to adhere to when assigning Product Tax Codes:
* **Ensure ALL of your products have Product Tax Codes** - our Monitoring and Calculation features both require Product Tax Codes to be assigned to all products. With respect to Monitoring, if Product Tax Codes are missing (even for historical products that are no longer in use), the transactions associated with those products won't be counted in your nexus analysis. With respect to Calculation, if a product being sold doesn't have a Product Tax Code, we won't be able to calculate tax on the transaction and an error will be return in your billing flow.
* **Avoid creating one-off products** - we often see businesses creating individual products for every invoice they send out / every different customer. This causes issues as you have to assign tax codes to every single product you create which can be tedious and lead to errors. Every major billing system usually has a way to setup products so that you can reuse them in subsequent invoices (e.g. Stripe has a Product Catalog that allows you to standardize your product classes and avoid creating one-off products). This means you just need to setup your product tax codes once!
* **Never bundle your products** - we also see businesses bundling services with a software / tangible product, or bundling a B2C and B2B offering. This causes big issues with tax authorities as these different offerings have very different tax determinations, meaning you will over / underpay tax. You need to split these products out in your billing system so that seperate tax codes can be applied to each
* **If unsure, ask your Sphere rep** - we've dealt with tax determinations for many different types of products and can provide you with information on request so that you can make the right choice.
## **Rates**
Once we know whether your product is taxable in the region you are selling it in, we then need to determine the rate to assign.
Rates change in every region and in some instances change at the rooftop level (especially in the US!).
Sphere uses advanced scraping technology to collate and monitor rates across tax authority websites, information bulletins and third party sources around the world. This means we have the world's broadest, best maintained global rate database that we offer to our customers.
### Region assignment
To ensure we are pulling the correct rate for each transaction, we need to be able to accurately assign a taxable region to each transaction. However, quality of location data can be variable and so we have a priority ranking mechanism to assign the correct taxable region.
We've included a simplified priority ranking mechanism below (although this changes based on billing system used):
1. Shipping Address of Transaction
2. Shipping Address of Customer (there is often a customer profile / object within billing systems)
3. Billing Address of Transaction
4. Billing Address of Customer
5. Card Issue Country
Ultimately, tax authorities want to know where the services / goods are being used, hence shipping address is always seen as the gold standard in allocating the taxable region.
## **Tax ID Verification**
{% embed url="" %}
How to add a **Tax Exemption Certificates**
{% endembed %}
In some instances, tax is not collected on transactions due to the nature of the recipient. There are two main examples of this which Sphere caters to.
### Cross border B2B software sales
When selling internationally, many countries allow B2B software vendors to apply what is called the *reverse charge mechanism,* where a non-resident vendor can push the tax obligation onto the customer IF the following conditions are met:
* The customer provides a valid VAT / GST ID
* The invoice provided to the customer notes that the reverse charge mechanism is being applied as well as including the validated ID number
Sphere has connected to tax ID verifications APIs from each region around the world to help you validate VAT IDs in two ways:
***Automatically***: we can extract VAT IDs directly from billing systems and return whether the ID was successfully validated or not (if it was then tax will not be applied to the transaction, if not tax will be applied).
***Manually***: In the Customers section of the Sphere app, click on any customer, scroll down to the Tax ID table, click 'Add Tax ID' and then enter the region and the Tax ID number. A validation / error message will be returned.
#### Tax ID Status Definitions
Sphere uses the following statuses to describe the state of each tax ID:
* `Verified` - The tax ID has been verified with the tax ID database with the relevant authority. Tax IDs in this status **apply** the reverse charge mechanism.
* `Pending` - The tax ID is pending verification with the tax ID database with the relevant tax authority. Tax IDs with this status **apply** the reverse charge mechanism.
* `Valid` - The tax ID format is valid, but verification with the relevant tax authority is not available.
Tax IDs with this status **apply** the reverse charge mechanism.
* `Invalid` - The tax ID format is invalid. Tax IDs with this status **do not apply** the reverse charge mechanism.
* `Failed` - The tax ID failed verification with the relevant authority's tax ID database (for example, it was not found in the relevant tax authority database). Tax IDs with this status **do not apply** the reverse charge mechanism.
* `Unsupported` - the region of this tax ID is not supported.
International VAT and GST IDs can be added and validated within the Customers feature in Sphere
### **Tax Exemption Certificates**
In the US, customers may hold tax exemption certificates for a variety of different reasons (they may be resellers or in an exempt industry category). This means that these customers are exempt from sales tax.
Sphere offers Exemption Certificate Management in the Customers section of the Sphere app. If a customer sends you their certificate, click on the relevant customer in the Customers section, scroll down to the Tax ID table and upload the tax exemption certificate. You can also select the date for which the certificate is valid and Sphere will send you an email to remind you to request a new certificate from your customer when it expires.
# Integrations
Our Integrations are essential to apply real time tax calculation in your existing billing flows.
To enable real-time tax calculation, we support custom billing flows (via our API) as well as integrations with key billing systems.
# API
Sphere provides an API which allows you to call our tax engine within custom billing flows.
## Overview
Sphere's API allows businesses to call our tax engine within their custom billing and checkout flows.
We are also working on providing our API for third party software vendors to embed indirect tax compliance into their products. More to come on this soon!
## [](https://docs.getsphere.com/api-reference/introduction#authentication)Authentication
The API endpoint requires authentication using an API key. To access the Sphere Tax Calculation API, you must include this API key in your request headers.
### Getting Your API Key
Please contact the Sphere team to obtain your unique API key. Once you have your key, you can include it in the header of each API request as shown below.
### Example Request Header
Include the API key in the `X-API-KEY` header:
```
X-API-KEY: YOUR_API_KEY
```
# Tax Calculation
Details on our real-time tax calculation API as well as error codes and messages are provided below.
## **Prerequisites**
1. A Sphere account is required. Please contact the Sphere sales team for access (you can either book a consult [here](https://calendly.com/d/44n-bjc-wq7/meeting-with-sphere-team) or email our CEO directly at )
2. After logging in, navigate to the Products section and ensure that the products in your billing system are listed in the Products table.
1. **Note:** To populate the *Products* tab, you must first connect a billing provider in the Sphere app (via the Integrations section of the app). This connection will automatically retrieve and display the products from your billing provider.
3. Verify that each Product has an assigned Product Tax Code, which is used to determine the taxability of your product around the world (refer to [Tax Determination](/features/calculation#tax-determination) section).
1. **Note:** If the you don't assign Product Tax Codes to your products and you include product IDs in the payload sent to the Sphere Tax Calculation API, the API will respond with a 400 Bad Request error.
4. Make sure you are registered with the appropriate tax authority in Sphere (via the [Registrations](/features/registration) section of the app) for the customer address you plan to provide, and verify that the tax calculation toggle is switched on in the relevant Region page (refer to [Autofiling and Tax Calculations](/features/registration#autofiling-and-tax-calculations) section).
1. **Note**: If you are not registered with a tax authority or the tax calculation toggle is switched off, the API will return empty tax\_amounts arrays for line items. (See [API Response](/features/integrations/api/tax-calculation#api-response) section below)
***
## Endpoint
* **URL:**
* **Method:** POST
***
## Authentication
To access this endpoint, you need an API key, which must be provided in the request header.
* **Header Key:** X-API-KEY
* **Header Value:** YOUR\_API\_KEY
***
## **Request Payload**
**1. customer\_id** (string, optional): Represents the customer’s identifier in the billing platform (e.g., cus\_ABC123 for Stripe).
**2. customer\_address (object, required):** Contains the customer’s address details for tax calculation.
* **address1** (string, optional): First line of the address.
* **address2** (string, optional): Second line of the address.
* **city** (string, required): City name.
* **state** (string, optional): State or region.
* **postal\_code** (string, required): Postal or ZIP code.
* **country** (string, required): Country name.
**3. line\_items (array of objects, required):** A list of items for which tax needs to be calculated.
Each item includes:
* **id** (string, optional): A unique identifier for the line item in your system (e.g., `line_item_1`). If provided, it will also be included in the API response.
* **amount** (integer, required): The item’s price in cents (e.g., 10000 for $100.00).
* **product\_id** (string, required): Unique identifier for the product. This id has already been defined in Sphere (under the Products tab). It’s important to note that this represents the product’s ID within the billing platform. For example, if Stripe is used, the ID might look like prod\_ABC123.
* **discount\_amount** (integer, optional, default 0): Discount applied to the item in cents.
* **tax\_inclusive** (boolean, optional, default false): Indicates if the item price includes tax.
**4. currency (string, required):** The currency code (ISO 4217 format) in which the amounts are specified. For example: “usd”. **Note:** Only lowercase currency codes are accepted.
### **Request Structure**
The request should be in JSON format. Here is a sample request payload:
```json
{
"customer_id": "cus_RQx5PQDFSMH6Ku",
"customer_address": {
"address1": "Investors Boulevard",
"city": "Myrtle Beach",
"state": "SC",
"postal_code": "29579",
"country": "US"
},
"line_items": [
{
"amount": 10000,
"product_id": "prod_RArEhwhXLfX5jF",
"discount_amount": 0,
"tax_inclusive": false
}
],
"currency": "usd"
}
```
***
## **API Response**
* **lines** (array): Contains tax information for each line item.
* **id** (string): If a line item ID was included in the request payload, it will be returned here. Otherwise, the product ID will be used as the line item’s ID.
* **tax\_amounts** (array): A list of taxes applied to the line item.
* **amount** (integer): Tax amount in cents for this specific tax.
* **taxable\_amount** (integer): Amount subject to the tax in cents.
* **tax\_rate** (object): Details of the tax rate applied.
* **percentage** (float): Tax rate as a percentage.
* **inclusive** (boolean): Indicates if the tax is inclusive.
* **display\_name** (string): Name of the tax (e.g., “Tourism Development Tax”).
* **jurisdiction** (string): The tax jurisdiction (e.g., “Myrtle Beach”).
* **country** (string): Country code (e.g., “US”).
* **state** (string): State or region code (e.g., “SC”).
* **tax\_type** (string): One of:
* sales\_tax
* gst
* hst
* pst
* qst
* lease\_tax
* amusement\_tax
* vat
* jct
* communications\_tax
* igst
* retail\_delivery\_fee
* rst
* service\_tax
* **sphere\_tax\_calculation\_id** (string): Unique identifier for the tax calculation request.
### **Response Structure**
The API will respond with a 200 status code and return the calculated tax details for each line item, along with a unique Sphere tax calculation ID. Here is a sample response:
```json
{
"message": "Tax calculated successfully",
"data": {
"lines": [
{
"id": "prod_RArEhwhXLfX5jF",
"tax_amounts": [
{
"amount": 900,
"taxable_amount": 10000,
"tax_rate": {
"percentage": 9.0,
"inclusive": false,
"display_name": "Sales Tax",
"jurisdiction": "South Carolina",
"country": "US",
"state": "SC",
"tax_type": "sales_tax"
}
}
]
}
],
"sphere_tax_calculation_id": "cfd1e35a-ccb8-4bf1-86ed-49e332be220b"
}
}
```
***
## **Error Codes and Messages**
When calling the Sphere Tax Calculation API, you may encounter the following error responses. These error codes indicate specific issues with the data provided in the request.
### 1. **Unauthorized Access**
```json
{
"type": "api_error",
"code": "unauthorized_access"
}
```
* **Description:** This error occurs when the API key provided in the request header is either missing or invalid, resulting in denied access to the Sphere Tax Calculation API.
* **Resolution:** Verify that the API key is correctly included in the request headers. Ensure the key is correct, active, and authorized for this endpoint.
### 2. **Invalid Customer Tax Location**
```json
{
"type": "api_error",
"code": "customer_tax_location_invalid",
"message": "The customer address is either invalid or incomplete."
}
```
* **Description:** This error occurs when the customer’s address information in the request payload is incomplete or invalid. Ensure that the address fields, particularly address1, city, state, postal\_code, and country, are correctly populated and valid.
* **Resolution:** Verify the address information and resend the request.
### **3. Invalid Product Tax Code**
```json
{
"type": "api_error",
"code": "invalid_product_tax_code",
"message": "One or more products are missing a tax code assignment in Sphere. Please ensure all products have a tax code to proceed."
}
```
* **Description:** This error indicates that one or more products listed in the line\_items array lack a tax code assignment in Sphere. Tax codes are required to calculate the appropriate tax rates for each product.
* **Resolution:** Review the products in the line\_items section, and make sure each has a valid tax code assigned in Sphere. Once the missing tax codes are added, retry the request.
### **4. Too Many Requests**
```json
{
"type": "api_error",
"code": "too_many_requests"
}
```
* **Description:** This error indicates that the client has exceeded the maximum number of requests allowed within a specific time frame. The Sphere API enforces rate limits to prevent overloading and ensure fair access.
* **Resolution:** Pause requests temporarily to allow the rate limit to reset. You may need to wait several minutes before retrying. If you frequently encounter this error, consider adjusting the frequency of requests or contacting Sphere support to discuss rate limit options.
# Example Billing Flows with Stripe
Instructions on how to integrate the Sphere API with different Stripe checkout alternatives.
You have the option to either:
* Create custom checkouts using Stripe Elements - this allows for greater flexibility and customization of the payment form, or
* Utilize Stripe-hosted Checkouts - where Stripe manages the entire checkout experience for you.
Both methods involve incorporating the Sphere API to calculate taxes, ensuring accurate tax rates are applied during the checkout process.
# Stripe-hosted Checkout
Instructions on how to setup Sphere's API while using Stripe-hosted Checkout
## Overview
To create a Stripe-hosted Checkout session with taxes calculated using the Sphere API, follow these steps:
1. Call the Sphere Tax Calculation API to retrieve applicable tax rates.
2. Create Stripe Tax Rates corresponding to each rate provided by Sphere. For details, refer to [Stripe’s Tax Rate documentation](https://docs.stripe.com/api/tax_rates/create).
3. Create a Stripe Checkout Session (Step 3a) or an Invoice (Step 3b) and, associate the Stripe tax rates derived from the Sphere API calculations.
***
## **Step 1: Call the Sphere Tax Calculation API**
Make a **POST** request to the Sphere Tax Calculation API to retrieve applicable tax rates for a given customer address and product.
**Endpoint:**
**Request Headers:**
* **Header Key:** X-API-KEY
* **Header Value:** YOUR\_API\_KEY
**Sample Request:**
```sh
curl -X \
POST https://server.getsphere.com/tax_api/calculate_tax \
-H \
"Content-Type: application/json" \
-H \
"X-API-KEY: sph_api_key" \
-d '{
"customer_address": {
"address1": "Investors Boulevard",
"city": "Myrtle Beach",
"state": "SC",
"postal_code": "29579",
"country": "US"
},
"line_items": [
{
"amount": 10000,
"product_id": "prod_RArEhwhXLfX5jF",
"discount_amount": 0,
"tax_inclusive": false
}
],
"currency": "usd"
}'
```
**Sample Response:**
```json
{
"lines": [
{
"id": "prod_RArEhwhXLfX5jF",
"tax_amounts": [
{
"amount": 900,
"taxable_amount": 10000,
"tax_rate": {
"percentage": 6.0,
"inclusive": false,
"display_name": "South Carolina",
"jurisdiction": "South Carolina",
"country": "US",
"state": "SC"
}
}
]
}
],
"sphere_tax_calculation_id": "cfd1e35a-ccb8-4bf1-86ed-49e332be220b"
}
```
***
## **Step 2: Create Stripe Tax Rate Objects**
For each tax rate returned by the Sphere Api, create a corresponding Stripe Tax Rate object. You’ll need to pass Stripe the tax details provided by the Sphere Api. [Stripe’s Tax Rate documentation](https://docs.stripe.com/api/tax_rates/create).
**Sample Requests:**
```bash
curl https://api.stripe.com/v1/tax_rates \
-u "your-stripe-api-key-here" \
-d display_name="South Carolina" \
-d description="South Carolina Tax" \
-d percentage=9.0 \
-d jurisdiction="South Carolina" \
-d inclusive=false
```
**Note:**
* Replace **your-stripe-api-key-here** with your actual Stripe API key.
* All other data in the payload is sourced from the Sphere Tax API response. **(Refer to the sample response in Step 1 for details.)**
After each successful request, Stripe will return a Tax Rate object that includes an **id**. Save each **id**, as you will need these in Step 3. Sample Tax Rate ID:
txr\_1QJqyzLSmZDVqIUdFs615ZB6
***
## **Step 3a: Create the Stripe Checkout Session**
To initiate a checkout session or directly create an invoice, you’ll need to provide Stripe with the Tax Rate ID (from Step 2) and other relevant details. For more guidance, refer to [Stripe’s Checkout Session documentation](https://docs.stripe.com/api/checkout/sessions/create).
**Note:** Make sure to include the **sphere\_tax\_calculation\_id** (from Step 1) in the metadata field of the Stripe session. This ID links Sphere’s tax calculation to the Stripe checkout session, ensuring accurate tracking. The method for including the sphere\_tax\_calculation\_id varies between subscriptions and one-time payments.
#### **1. Subscription Checkout Session**
A subscription checkout is used for recurring payments where the customer is billed on a regular basis (e.g., monthly or annually). The checkout session links to Stripe’s subscription system, allowing for automatic renewals, billing cycles, and management of recurring charges.
For subscriptions, add the **sphere\_tax\_calculation\_id** within the `subscription_data[metadata]` field.
**Sample cURL for Subscription:**
```bash
curl https://api.stripe.com/v1/checkout/sessions \
-u "your-stripe-api-key-here" \
--data-urlencode "success_url=redirect-url" \
-d "line_items[0][price]=stripe-price-id" \
-d "line_items[0][quantity]=1" \
-d "line_items[0][tax_rates][0]=txr_1QJqyzLSmZDVqIUdFs615ZB6" \
-d "subscription_data[metadata][sphere_tax_calculation_id]=cfd1e35a-ccb8-4bf1-86ed-49e332be220b" \
-d "customer=stripe-customer-id"
-d "mode=subscription"
```
**Note:**
* Replace **your-stripe-api-key-here** with your actual Stripe API key.
* The **Tax Rate ID** (txr\_1QJqyzLSmZDVqIUdFs615ZB6) used in the cURL, was generated in Step 2.
* The **sphere\_tax\_calculation\_id**: cfd1e35a-ccb8-4bf1-86ed-49e332be220b was provided by the Sphere Api, in Step 1.
* Replace the **stripe-price-id** and **stripe-customer-id** with actual values.
**2. One-Time Payment Checkout Session**
A one-time payment checkout is designed for a single transaction, with no additional charges applied unless a new payment session is created. This is commonly used for one-off purchases or services. Please note that invoices are not automatically generated for One-Time Payment Checkout Sessions.
To enable invoice creation, you need to set the property **invoice\_creation\[enabled]=true**.
Additionally, the methods for passing **sphere\_tax\_calculation\_id** differ depending on whether invoice generation is enabled.
Here’s how you should include the **sphere\_tax\_calculation\_id** in your request:
**Sample cURL for One-Time Payment *****with***** invoice generation:**
```bash
curl https://api.stripe.com/v1/checkout/sessions \
-u "your-stripe-api-key-here" \
--data-urlencode "success_url=redirect-url" \
-d "line_items[0][price]=stripe-price-id" \
-d "line_items[0][quantity]=1" \
-d "line_items[0][tax_rates][0]=txr_1QJqyzLSmZDVqIUdFs615ZB6" \
-d "invoice_creation[enabled]=true" \
-d "invoice_creation[invoice_data][custom_fields][0][name]=sphere_tax_calculation_id" \
-d "invoice_creation[invoice_data][custom_fields][0][value]=cfd1e35a-ccb8-4bf1-86ed-49e332be220b" \
-d "customer=stripe-customer-id"
-d "mode=payment"
```
**Sample cURL for One-Time Payment *****without***** invoice generation:**
```bash
curl https://api.stripe.com/v1/checkout/sessions \
-u "your-stripe-api-key-here" \
--data-urlencode "success_url=redirect-url" \
-d "line_items[0][price]=stripe-price-id" \
-d "line_items[0][quantity]=1" \
-d "line_items[0][tax_rates][0]=txr_1QJqyzLSmZDVqIUdFs615ZB6" \
-d "metadata[sphere_tax_calculation_id]=cfd1e35a-ccb8-4bf1-86ed-49e332be220b" \
-d "customer=stripe-customer-id"
-d "mode=payment"
```
**Note:**
* Replace **your-stripe-api-key-here** with your actual Stripe API key.
* The **Tax Rate ID** (txr\_1QJqyzLSmZDVqIUdFs615ZB6) used in the cURL, was generated in Step 2.
* The **sphere\_tax\_calculation\_id**: cfd1e35a-ccb8-4bf1-86ed-49e332be220b was provided by the Sphere Api, in Step 1.
* Replace the **stripe-price-id** and **stripe-customer-id** with actual values.
***
## **Step 3b: Direct Invoice Creation (One-Time Payment)**
Creating an invoice directly for a one-time payment involves two steps:
> **a. Generate the Invoice Object**\
> First, create the invoice object for the customer.
> **b. Create Invoice Items with Tax Rates**\
> Next, add items to the invoice and apply tax rates to each item, associating them with the invoice object.
**a. Creating an Invoice**
To issue a direct invoice for a customer, use the following cURL command. The invoice will automatically charge the customer upon finalization.
\
**Sample cURL for Generating a Stripe Invoice:**
```bash
curl https://api.stripe.com/v1/invoices \
-u "your-stripe-api-key-here" \
-d "customer=stripe-customer-id" \
-d "auto_advance=true" \
-d "collection_method=charge_automatically" \
-d "metadata[sphere_tax_calculation_id]=cfd1e35a-ccb8-4bf1-86ed-49e332be220b"
```
**Parameters:**
* **customer:** The ID of the customer to whom the invoice is issued.
* **auto\_advance:** When set to true, the invoice will automatically finalize after it is created.
* **collection\_method:** charge\_automatically means Stripe will charge the customer’s stored payment method.
* **metadata\[sphere\_tax\_calculation\_id]:** Associates the invoice with an external tax calculation ID for tracking.
**b. Adding Invoice Items with Tax Rates**
Once the invoice is created, you can add items to it, each with applicable tax rates.
**Sample cURL for Adding Stripe Invoice Items:**
```bash
curl https://api.stripe.com/v1/invoiceitems \
-u "your-stripe-api-key-here" \
-d "customer=stripe-customer-id" \
-d "price=stripe-price-id" \
-d "quantity=1" \
-d "description=Product Name" \
-d "invoice=in_1QJwL6LSmZDVqIUd8wrBeGMK" \
-d "tax_rates[]=txr_1QJqyzLSmZDVqIUdFs615ZB6"
```
**Parameters:**
* **customer:** The ID of the customer being invoiced.
* **price:** The price ID of the product or service being added to the invoice.
* **quantity:** Quantity of the product being invoiced.
* **description:** A description for the invoice item, such as the product name.
* **invoice:** The ID of the invoice to which this item should be added.
* **tax\_rates\[]:** List of tax rate IDs to apply to the item.
**Note:**
* Replace **your-stripe-api-key-here** with your actual Stripe API key.
* The **Tax Rate ID** (txr\_1QJqyzLSmZDVqIUdFs615ZB6) used in the cURL, was generated in Step 2.
* The **sphere\_tax\_calculation\_id**: cfd1e35a-ccb8-4bf1-86ed-49e332be220b was provided by the Sphere Api, in Step 1.
* Replace the **stripe-price-id** and **stripe-customer-id** with actual values.
# Custom Checkout with Stripe Elements
Instructions on how to setup Sphere's API while using Stripe Elements in a custom checkout
## Overview
To create a custom checkout session with taxes calculated using the Sphere API, follow these steps:
1. Call the Sphere Tax Calculation API to retrieve applicable tax rates.
2. Create Stripe Tax Rates corresponding to each rate provided by Sphere. For details, refer to [Stripe’s Tax Rate Documentation](https://docs.stripe.com/api/tax_rates/create).
3. Develop a custom payment form using Stripe Elements, either for one-time payments (Step 3a) or subscriptions (Step 3b), and link the Stripe tax rates obtained from the Sphere API calculations.
Stripe Elements are pre-built UI components provided by Stripe for securely collecting payment information, such as card details and payment method preferences. These components are customizable to match your website’s design and work seamlessly with Stripe’s APIs for secure payment processing. For detailed guidance, refer to[ Stripe Elements Documentation](https://docs.stripe.com/payments/elements).
***
## **Step 1: Call the Sphere Tax Calculation API**
Make a **POST** request to the Sphere Tax Calculation API to retrieve applicable tax rates for a given customer address and product.
**Endpoint:**
**Request Headers:**
* **Header Key:** X-API-KEY
* **Header Value:** YOUR\_API\_KEY
**Sample Request:**
```sh
curl -X \
POST https://server.getsphere.com/tax_api/calculate_tax \
-H \
"Content-Type: application/json" \
-H \
"X-API-KEY: sph_api_key" \
-d '{
"customer_address": {
"address1": "Investors Boulevard",
"city": "Myrtle Beach",
"state": "SC",
"postal_code": "29579",
"country": "US"
},
"line_items": [
{
"amount": 10000,
"product_id": "prod_RArEhwhXLfX5jF",
"discount_amount": 0,
"tax_inclusive": false
}
],
"currency": "usd"
}'
```
**Sample Response:**
```json
{
"lines": [
{
"id": "prod_RArEhwhXLfX5jF",
"tax_amounts": [
{
"amount": 900,
"taxable_amount": 10000,
"tax_rate": {
"percentage": 6.0,
"inclusive": false,
"display_name": "Sales Tax",
"jurisdiction": "South Carolina",
"country": "US",
"state": "SC",
"tax_type": "sales_tax"
}
}
]
}
],
"sphere_tax_calculation_id": "cfd1e35a-ccb8-4bf1-86ed-49e332be220b"
}
```
***
## **Step 2: Create Stripe Tax Rate Objects**
For each tax rate returned by the Sphere Api, create a corresponding Stripe Tax Rate object. You’ll need to pass Stripe the tax details provided by the Sphere Api. [Stripe’s Tax Rate documentation](https://docs.stripe.com/api/tax_rates/create).
**Note: This step is optional for building a one-time payment form but mandatory for subscriptions.**
**Sample Requests:**
```bash
curl https://api.stripe.com/v1/tax_rates \
-u "your-stripe-api-key-here" \
-d display_name="Sales Tax" \
-d description="South Carolina Tax" \
-d tax_type="sales_tax \
-d percentage=9.0 \
-d jurisdiction="South Carolina" \
-d inclusive=false
```
**Note:**
* Replace **your-stripe-api-key-here** with your actual Stripe API key.
* All other data in the payload is sourced from the Sphere Tax API response. **(Refer to the sample response in Step 1 for details.)**
After each successful request, Stripe will return a Tax Rate object that includes an **id**. Save each **id**, as you will need these in Step 3. Sample Tax Rate ID: **txr\_1QJqyzLSmZDVqIUdFs615ZB6**
***
## **Step 3a:** Custom Payment Form with Tax Integration - One time payment
To build a custom payment form, you can follow [Stripe's tutorial on embedding Elements and personalizing the checkout experience](https://docs.stripe.com/payments/quickstart?client=react\&lang=node). The following guide extends Stripe's workflow by incorporating Sphere API to calculate taxes, offering a streamlined approach for tax-inclusive transactions.
At the core of Stripe’s payment system are Payment Intents, which are flexible, low-level payment objects used to manage the entire payment lifecycle. They support dynamic amounts and enable custom integrations, but they do not handle subscriptions or invoicing automatically. Consequently, taxes and any other charges must be manually included in the amount field when creating a Payment Intent. For further details, consult the[ Stripe Payment Intents API Documentation](https://stripe.com/docs/api/payment_intents).
\
**Quick Summary of Integration Steps**
The following steps summarize Stripe’s official documentation with the Sphere API integration as the added layer:
1. **Calculate Taxes with Sphere API (Discussed in Step 1):**
1. Use Sphere’s API to calculate tax amounts:
1. Send a POST request with the customer’s address and product details to the Sphere Tax Calculation API.
2. Receive a response with the calculated tax.
2. **Create a Payment Intent with Taxes (Server-Side):**
With Stripe’s SDK, create a PaymentIntent:
1. Include the product subtotal, tax from Sphere API, and additional fees if applicable.
2. Specify the currency and payment method options.
3. Return the PaymentIntent client\_secret to the frontend.
3. **Set Up Stripe Elements on the Client:**
1. Use Stripe.js to initialize Stripe Elements.
2. Build a payment form using components such as the Card Element or Payment Element.
4. **Integrate Tax Details into Checkout UI:**
Display order details on the checkout page:
1. Subtotal
2. Tax (calculated via Sphere API)
3. Total (subtotal + tax)
5. **Confirm Payment (Client-Side):**
1. Use the client\_secret from the PaymentIntent to confirm the payment with stripe.confirmPayment.
***
## **Step 3b:** Custom Payment Form with Tax Integration - Subscription
To build a custom payment form for subscriptions, you can follow the [Prebuilt subscription page with Stripe Checkout](https://docs.stripe.com/billing/quickstart?lang=node). This guide enhances Stripe's workflow by integrating the Sphere API for calculating taxes, enabling streamlined tax-inclusive transactions. Below are detailed steps for implementing this integration:
Stripe Billing facilitates managing recurring subscriptions and invoices. Here's a revised guide incorporating the Sphere API for tax-inclusive subscriptions:
**Quick Summary of Integration Steps**
1. **Create Products and Prices:**
1. Define your products and pricing tiers in Stripe (e.g., monthly or yearly plans).
2. **Create** a Customer:
1. Create a customer object in Stripe, storing basic customer details like name and email.
3. **Calculate Taxes with Sphere API (Discussed in Step 1):**
1. Use Sphere’s API to calculate tax amounts. Send a POST request with the customer’s address and product details to the Sphere Tax Calculation API.
2. Receive a response with the calculated tax.
4. **Create Stripe Tax Rates (Discussed in Step 2):**
1. Use the Stripe API to create tax rates based on the tax information retrieved from the Sphere API.
2. Specify the tax rate attributes such as percentage, display name, and jurisdiction.
5. **Create a subscription:**
1. Pass the created tax rates in the **tax\_rates** field.
2. Ensure to set payment\_behavior to "default\_incomplete" for subscriptions requiring payment confirmation.
3. The modified code snippet below enhances the [Stripe Node.js code snippet for creating a subscription](https://docs.stripe.com/billing/subscriptions/build-subscriptions?platform=web\&ui=elements#create-subscription) by including tax rates and the the sphere\_tax\_calculation\_id (e.g., **cfd1e35a-ccb8-4bf1-86ed-49e332be220b**) in the metadata field, where the **sphere\_tax\_calculation\_id** is provided by the Sphere API and is crucial for synchronizing invoices on our end. Additionally, the Tax Rate ID (**txr\_1QJqyzLSmZDVqIUdFs615ZB6**) used in the code was generated in Step 2.
app.post('/create-subscription', async (req, res) => {
  const customerId = req.cookies['customer'];
  const priceId = req.body.priceId;

  try {
    // Create the subscription. Note we're expanding the Subscription's
    // latest invoice and that invoice's payment_intent
    // so we can pass it to the front end to confirm the payment
    const subscription = await stripe.subscriptions.create({
      customer: customerId,
      items: [{
        price: priceId,
        tax_rates: ["txr_1QJqyzLSmZDVqIUdFs615ZB6"],
      }],
      payment_behavior: 'default_incomplete',
      payment_settings: { save_default_payment_method: 'on_subscription' },
      expand: ['latest_invoice.payment_intent'],
      metadata: {
        sphere_tax_calculation_id: "cfd1e35a-ccb8-4bf1-86ed-49e332be220b",
      },
    });

    res.send({
      subscriptionId: subscription.id,
      clientSecret: subscription.latest_invoice.payment_intent.client_secret,
    });
  } catch (error) {
    return res.status(400).send({ error: { message: error.message } });
  }
});
6. **Set Up Stripe Elements on the Client:**
1. Use Stripe.js to initialize Stripe Elements.
2. Build a payment form using components such as the Card Element or Payment Element.
7. **Integrate Tax Details into Checkout UI:**
1. Display order details on the checkout page:
1. Subtotal
2. Tax (calculated via Sphere API)
3. Total (subtotal + tax)
8. **Confirm Payment (Client-Side):**
1. Use the client\_secret from the PaymentIntent to confirm the payment with stripe.confirmPayment.
[^1]: Pass the Tax Ids, generated in Step 5.
[^2]: Ensure that the sphere\_tax\_calculation\_id is included in the metadata field of the subscription. The sphere\_tax\_calculation\_id (e.g., **cfd1e35a-ccb8-4bf1-86ed-49e332be220b**) is provided by the Sphere API. It is crucial to pass this value, as it is required to synchronize invoices on our end.
# Transaction Export
Export your Sphere transaction data programmatically via CSV. The API uses an async job model: you create an export, poll for completion, and download the file via a presigned URL.
### Prerequisites
* A Sphere account with an active billing provider connection (via the **Integrations** section of the app).
* An API key (see **Settings > API Keys** in the Sphere dashboard). The key must be included in every request header.
### Authentication
All endpoints require an API key in the request header.
* **Header Key:** `X-API-KEY`
* **Header Value:** `YOUR_API_KEY`
### Endpoints
#### 1. Create Export
Starts an asynchronous export job. Returns a `job_id` that you use to poll for status.
**URL:** `https://server.getsphere.com/tax_api/exports`
**Method:** POST
**Request Payload**
| Field | Type | Required | Description |
| ------------------ | ---------------- | -------- | ----------------------------------------------------------------------------------- |
| `date_range_start` | string | Yes | Start date in `YYYY-MM-DD` format |
| `date_range_end` | string | Yes | End date in `YYYY-MM-DD` format |
| `country_in` | array of strings | No | Filter by country codes (e.g., `["US", "CA"]`). Default: all countries |
| `status_in` | array of strings | No | Filter by transaction status (e.g., `["finalized", "paid"]`). Default: all statuses |
| `sources_in` | array of strings | No | Filter by data source (e.g., `["stripe", "netsuite"]`). Default: all sources |
| `tax_authority_in` | array of strings | No | Filter by tax authority keys (e.g., `["sc_us"]`). Default: all regions |
| `include_zero` | boolean | No | Include zero-amount transactions. Default: `true` |
| `processing` | string | No | One of: `"all"`, `"processed"`, `"unprocessed"`. Default: `"all"` |
**Request Example**
```bash
curl -X POST https://server.getsphere.com/tax_api/exports \
-H "X-API-KEY: YOUR_API_KEY" \
-H "Content-Type: application/json" \
-d '{
"date_range_start": "2025-01-01",
"date_range_end": "2025-03-31",
"status_in": ["finalized", "paid"],
"country_in": ["US"]
}'
```
**Response (201 Created)**
```json
{
"job_id": 12345,
"status": "pending"
}
```
#### 2. Get Export Status
Poll this endpoint to check whether your export is ready for download.
**URL:** `https://server.getsphere.com/tax_api/exports/{job_id}`
**Method:** GET
**Request Example**
```bash
curl https://server.getsphere.com/tax_api/exports/12345 \
-H "X-API-KEY: YOUR_API_KEY"
```
**Response — Pending or Running**
```json
{
"job_id": 12345,
"status": "pending",
"created_at": "2025-03-20T10:30:00+00:00"
}
```
The `status` field will be one of: `"pending"`, `"running"`, `"completed"`, or `"failed"`.
**Response — Completed**
When the export is ready, the response includes a `download_url` — a presigned S3 URL that expires after 24 hours.
```json
{
"job_id": 12345,
"status": "completed",
"created_at": "2025-03-20T10:30:00+00:00",
"completed_at": "2025-03-20T10:30:45+00:00",
"download_url": "https://sphere-file-storage.s3.amazonaws.com/..."
}
```
Download the file by making a GET request to the `download_url`. No authentication header is needed for the download — the URL is self-authenticating.
**Response — Failed**
```json
{
"job_id": 12345,
"status": "failed",
"created_at": "2025-03-20T10:30:00+00:00",
"error_message": "Export failed due to an internal error."
}
```
#### 3. Cancel Export
Cancel a pending or in-progress export job.
**URL:** `https://server.getsphere.com/tax_api/exports/{job_id}/cancel`
**Method:** POST
**Request Example**
```bash
curl -X POST https://server.getsphere.com/tax_api/exports/12345/cancel \
-H "X-API-KEY: YOUR_API_KEY"
```
**Response (200 OK)**
```json
{
"job_id": 12345,
"status": "cancelled"
}
```
Note: Only jobs with status `"pending"` or `"running"` can be cancelled. Attempting to cancel a completed or failed job returns a 400 error.
### Recommended Polling Strategy
After creating an export, poll the status endpoint at a reasonable interval:
```
1. POST /tax_api/exports → get job_id
2. Wait 2-5 seconds
3. GET /tax_api/exports/{job_id}
4. If status is "pending" or "running", go to step 2
5. If status is "completed", download the file from download_url
6. If status is "failed", handle the error
```
Most exports complete within a few seconds. Larger exports (many months of data across all regions) may take longer.
### Rate Limits
You can have a maximum of **3 concurrent exports** per organization. Jobs with status `"pending"` or `"running"` count toward this limit. Completed, failed, and cancelled jobs do not.
If you exceed this limit, the API returns a 429 error:
```json
{
"error": "Too many concurrent exports. Maximum 3 allowed."
}
```
### CSV Columns
The exported CSV includes the following columns:
| Column | Description |
| ---------------------------- | ----------------------------------------------------- |
| Invoice Id | Transaction identifier |
| Customer Id | Customer identifier from your billing system |
| Customer Name | Customer display name |
| Type | Transaction type (e.g., invoice, credit\_note) |
| Line Item Id | Line item identifier |
| Status | Transaction status (finalized, paid, cancelled, etc.) |
| Transaction Source | Data source (e.g., stripe, netsuite) |
| Region | Tax jurisdiction name |
| Finalized On | Date the transaction was finalized |
| Paid On | Date the transaction was paid |
| Cancelled On | Date the transaction was cancelled |
| Event Date | Tax reporting date |
| Event Type | Tax reporting type (sale, refund) |
| Address | Customer address used for tax calculation |
| Description | Line item description |
| Product Name | Product display name |
| Product Tax Code | Tax code assigned to the product |
| Currency | Transaction currency code |
| Subtotal | Line item subtotal (in transaction currency) |
| Discount | Discount applied |
| Total | Line item total |
| Taxable Amount | Amount subject to tax |
| Total Tax Collected | Tax collected on the transaction |
| Sphere Calculated Tax | Tax amount calculated by Sphere |
| Filing Currency | Currency used for tax filing |
| Filing Exchange Rate | Exchange rate to filing currency |
| Filing Total | Total in filing currency |
| Filing Taxable Amount | Taxable amount in filing currency |
| Filing Total Tax Collected | Tax collected in filing currency |
| Filing Sphere Calculated Tax | Sphere-calculated tax in filing currency |
| Filing Status | Filing status for this transaction |
The CSV also includes **tax breakout columns** for each jurisdiction level (Country, State, County, City, District, Transit Authority), each with Name, Tax Rate, and Tax Amount sub-columns.
### Error Codes and Messages
#### 1. Unauthorized Access
```json
{
"type": "api_error",
"code": "unauthorized_access",
"message": "Invalid API key."
}
```
**Description:** The API key provided in the request header is either missing or invalid.
**Resolution:** Verify that the API key is correctly included in the request headers. Ensure the key is correct, active, and authorized for this endpoint.
#### 2. Missing Date Range
```json
{
"error": "date_range_start and date_range_end are required."
}
```
**Description:** One or both of the required date range fields are missing from the request body.
**Resolution:** Include both `date_range_start` and `date_range_end` in your request payload in `YYYY-MM-DD` format.
#### 3. Invalid Date Format
```json
{
"error": "Invalid date format. Use YYYY-MM-DD."
}
```
**Description:** A date field could not be parsed.
**Resolution:** Ensure dates are in `YYYY-MM-DD` format (e.g., `2025-01-31`).
#### 4. Too Many Concurrent Exports
```json
{
"error": "Too many concurrent exports. Maximum 3 allowed."
}
```
**Description:** Your organization already has 3 exports in progress.
**Resolution:** Wait for an existing export to complete or cancel one, then retry.
#### 5. Export Not Found
```json
{
"error": "Export job not found."
}
```
**Description:** The `job_id` does not exist or belongs to a different organization.
**Resolution:** Verify the `job_id` returned from the create endpoint.
# Prebuilt Connectors
Our Integrations feature offers a number of connectors that allow you to seamlessly integrate your billing and payroll providers without any engineering lift.
Sphere offers a number of prebuilt integrations with billing providers including Stripe, Chargebee and Campfire.
We also offer integrations with all major HRIS solutions via a universal API provider, Finch.
These connectors are available in the Integrations feature shown below.
# Campfire Integration
Integrating Campfire with Sphere enables a.) seamless transaction data import and b.) live tax calculation within Campfire invoices.
This guide provides step-by-step instructions on generating an API key in Campfire, linking it to Sphere for a secure integration, and setting up a webhook connection between the two platforms.
It also covers configuring the Sphere Tax API within Campfire to ensure accurate tax calculations.
### Part 1: Configure Data Synchronization from Campfire to Sphere
Follow the steps below to get started:
1. In your **Sphere account**, click on the **Connect** button on the Campfire tile.
2. In another window, open your **Campfire Dashboard** and navigate to the **Settings** tab. Click **API Keys** under the Developer section.
3. In the **API Keys** section, click **Create API Key** to generate a new key.
4. Go back to the your **Sphere account** and enter the API key generated in Step 3. Ensure there are no extra spaces before or after the value.
5. Click **Next** to complete the setup. A success message will confirm the connection.
6. Next, you'll proceed with setting up the webhook. Copy the **Campfire Webhook URL**.
7. Return to the **Campfire Dashboard**, go to the **Settings** tab in the left menu, and click **Webhooks**.
8. Create a new webhook and paste the URL you copied from Step 6. Ensure the "Active" checkbox is selected, enable all invoice-related topics from the list, and click "**Save**" when finished.
**Enabled topics:**
* Invoice.created
* Invoice.updated
* Invoice.deleted
* Invoice.payment
* Invoice.paid
* CreditMemo.created
* CreditMemo.updated
* CreditMemo.deleted
9. Once the webhook is enabled, copy the **HMAC-SHA256** secret in this step.
10. Go back to your Sphere account. In the **Campfire Webhook Secret** input field, paste the **Signing Secret** copied in Part 9, then click **Done**.
11. You’re all set! If the connection is successful, data will begin importing, and after some time, your products will appear in **Sphere**. You'll then need to assign tax codes to each of your products and tax will automatically populate on invoices in regions you are registered and where you've enabled automatic tax calculation.
### Part 2: Create a Sphere Tax API Key for Tax Calculation
**Note:** Currently, the Campfire app does not have a field to input the Sphere API key. To set it up, the API key must be shared with the Campfire team.
1. Click the **"Edit"** button on the Campfire integration card to make changes.
2. This will open a modal displaying the integration details. Click **"Generate API Key"** to create a new key.
3. Follow the steps to create a new API key.
4. Make sure to store the newly generated key securely, as you won’t be able to view it again later. You will need to share this with the Campfire team to set it up for your account.
5. This step is optional; you can revoke an existing key and generate a new one if necessary.
**Tax Calculation Flow**
When creating an invoice, after filling in all the details, you need to manually click the “Apply Tax From Sphere” button in Campfire. Note: After every change to the invoice, remember to click the button again so taxes can be recalculated.
# Chargebee Integration
Integrating Chargebee with Sphere enables a.) seamless transaction data import and b.) live tax calculation within Chargebee invoices.
This guide provides step-by-step instructions on generating an API key in Chargebee and connecting it to Sphere for a smooth and secure integration.
It also covers configuring the Sphere Tax API within Chargebee to ensure accurate tax calculations.
### Part 1: Configure Data Synchronization from Chargebee to Sphere
**Prerequisite:**\
**Note:** Before proceeding, please confirm with the Chargebee team whether your account is using **Product Catalogue v1.0**. If it is, let us know so we can update the necessary configuration settings.
Follow the steps below to get started:
1. In your Sphere account, click on the **Connect** button on the Chargebee tile.
2. In another window, open your **Chargebee Dashboard** and navigate to the **Settings** tab. Click **Configure Chargebee**.
3. Select **API Keys** from the menu.
4. In the **API Keys and Webhooks** section, click **+ Add API Key** to generate a new key.
5. A modal will appear asking for the key type. Choose **Read-Only Key**.
6. Select the **All** option to grant full read-only access, provide a name for the API key, and click **Create Key**.
7. Go back to your Sphere account and enter the API key generated in Step 5 along with your Chargebee site name, which can be found in your Chargebee URL.
1. **Example:** **
2. **Site Name:** *getsphere-test*
3. Ensure there are no extra spaces before or after the values.
8. Click **Save** to complete the setup. A success message will confirm the connection.
9. If the connection is successful, data will begin importing and your products will appear in Sphere (please provide time for all products to load successfully).
### Part 2: Configure Sphere Tax API Key for Tax Calculation
1. Click the **"Edit"** button on the Chargebee integration card to make changes.
2. This will open a modal displaying the integration details. Click **"Generate API Key"** to create a new key.
3. Follow the steps to create a new API key.
4. Make sure to store the newly generated key securely, as you won’t be able to view it again later.
5. Please visit the link below to add the Sphere application to your Chargebee account:\
`https://.chargebee.com/third_party/tax_providers/sphere/overview`
Remember to replace `` with your Chargebee domain URL.\
For example, in the URL [**https://sphere-test.chargebee.com/dashboards**](https://sphere-test.chargebee.com/dashboards), the domain is **sphere-test**.
6. Click the **"Get Started"** button located in the top right corner.
7. A modal will appear requesting the Sphere Tax API Key. Enter the key you generated in Step 4 of this guide.
8. It will guide you through a few steps. Click **"Proceed"** to continue.
9. In the **Configure Sync Rules** step, enable Chargebee to post invoices and credit notes to Sphere. Then, from the dropdown menu, select the **Commit all invoices and credit notes** option for the second question, and click **Proceed**.
10. Next, you'll need to configure Sphere for the countries where you will be calculating taxes. Click the **Go to Taxes** button to proceed.
11. You will need to define the regions where taxes will be applied. Click the option to **add regions**, and select the appropriate regions or countries for which you intend to calculate taxes.
12. For each region you add, be sure to choose **Sphere taxes** for that region.
13. You’re all set! You can now start creating invoices, and Sphere will automatically apply the taxes.
***
### Set up a connection between your Chargebee test account and Sphere
To integrate your Chargebee test site with Sphere, start by selecting your **test site** from the list of available Chargebee sites during the connection process.
**Note:** Before proceeding, please check with your Sphere representative to confirm that your Sphere test account is properly set up and aligned with your testing requirements.
Once you’ve selected the test site, you’ll notice visual indicators confirming that test mode is active — including:
* A **“test” label in the URL**
* A corresponding **test label in the left-hand navigation menu**
For detailed guidance on identifying and working with test sites, please refer to the official [Chargebee documentation](https://www.chargebee.com/docs/billing/2.0/getting-started/sites-intro). You can then follow the same connection steps as outlined above.
# Measure Integration
Integrating Measure with Sphere enables:\
a) seamless data imports (limited functionality as of now as we only sync products and customers), and\
b) real-time tax calculation on Measure invoices.
This guide walks you through generating an API key in Measure and connecting it to Sphere for a smooth, secure integration. It also explains how to configure the Sphere Tax API in Measure to ensure precise tax calculations.
### Part 1: Configure Data Synchronization from Measure to Sphere
**Note:** Currently, Sphere does not support importing invoices or credit notes from Measure. At this time, we only import products and customers to enable tax calculation. Our team is actively working on adding full transaction import support, and we appreciate your patience as we build this feature. We’ll share updates as soon as transaction imports become available.
Follow the steps below to get started:
1. In your Sphere account, click on the **Connect** button on the Measure tile.
2. In a new window, open your Measure Dashboard and navigate to the **Integrations** tab from the left-hand menu. Locate the **Sphere App** and click **Install**.
3. Click the **Connect Account** button.
4. Copy the required values — **Company ID** and **Measure API Key** — from Measure and paste them into Sphere. Then, click **Next** to continue.
5. You’re all set! Once the connection is successful, data will start importing, and your products will appear in Sphere shortly thereafter.
### Part 2: Configure Sphere Tax API Key for Tax Calculation
1. Click the **"Edit"** button on the Measure integration card to make changes.
2. This will open a modal displaying the integration details. Click **"Generate"** to create a new API key.
3. Follow the steps to create a new API key. Make sure to store the newly generated key securely, as you won’t be able to view it again later.
4. Then, in Measure, paste the newly generated API key into the field and click **Update**. Your integration is now complete.
5. Ensure all your 'Subscribed Regions' in Sphere have 'Tax Calculations' settings switched to Yes (see video [here](https://www.loom.com/share/6254e72b130c44808a59513046ee60ea?sid=463c87f3-0683-4622-a479-0f960620d332) on how to ensure this is done).
***
### Set up a connection between your Measure test account and Sphere
You’ll need to request the Measure team to create a test account for you, which can then be connected to your Sphere test account.
**Note:** Before proceeding, check with your Sphere representative to ensure your test account is properly configured and ready for testing.
# Light Integration
Integrating Light with Sphere enables:\
a) seamless data imports, and\
b) real-time tax calculation.
This guide walks you through connecting your Light app to Sphere for a seamless, secure integration. It also explains how to generate your Sphere Tax API key within Sphere to enable accurate and reliable tax calculations.
### Part 1: Configure Data Synchronization from Light to Sphere
Follow the steps below to get started:
1. In your Sphere account, click on the **Connect** button on the Light tile.
2. In Light, navigate to **Settings → API Keys** and click **+ Create Key**. Enter a name for the API key and assign it the **Admin** role. After the key is created, click **Copy Key** to copy it to your clipboard.
3. Navigate back to Sphere, and enter the Light API Key created into Sphere.
3. You’re all set! Once the connection is successful, data will start importing, and your products will appear in Sphere shortly thereafter.
### Part 2: Configure Sphere Tax API Key for Tax Calculation
1. Click the **"Edit"** button on the Light integration card to make changes.
2. This will open a modal displaying the integration details. Click **"Generate API Key"** to create a new key.
3. Follow the steps to generate a new API key. Be sure to store the key securely, as it cannot be viewed again later. You will need to share this key with the Light team so they can configure it in your account.
4. Ensure all your 'Subscribed Regions' in Sphere have 'Tax Calculations' settings switched to Yes (see video [here](https://www.loom.com/share/6254e72b130c44808a59513046ee60ea?sid=463c87f3-0683-4622-a479-0f960620d332) on how to ensure this is done).
***
# Maxio Integration
Integrating Maxio with Sphere allows for a) seamless import of transaction data and b) real-time tax calculation on Maxio invoices and credit notes.
This guide provides step-by-step instructions on generating an API key in Maxio and connecting it to Sphere for a smooth and secure integration.
It also covers configuring the Sphere Tax API within Maxio to ensure accurate tax calculations.
### Part 1: Configure Data Synchronization from Maxio to Sphere
Follow the steps below to get started:
1. In your Sphere account, click on the **Connect** button on the Maxio tile.
2. In a separate window, open your Maxio Dashboard and go to the **Integrations** tab under the **Config** section in the left navigation bar. Click the **Integrations** button, then select **New API Key** to generate an API key in Maxio.
3. Create the API key in Maxio and save it securely. Be sure to copy it somewhere safe, as you won’t be able to view it again later.
4. Return to your Sphere account and enter the API key generated in Step 3 along with your Maxio site name, which you can find in your Maxio URL.\
a. Example: `https://sphere-sandbox.chargify.com`\
b. Site Name: `sphere-sandbox`\
c. Make sure there are no extra spaces before or after the values.\
d. Click **Next**.
5. Next, set up a webhook connection with Maxio to receive live updates. Start by copying the Maxio Webhook URL from Sphere.
6. In Maxio, go to **Settings** in the main menu, then select **Webhooks** from the options. Once there, click on the **Add New Endpoint** button to create a new webhook. This will allow you to configure the connection to receive live updates from Sphere.
7. Enter the webhook URL you copied from Sphere into Maxio. Then, under **Webhook Subscriptions**, select the following events:\
a. Payment Success\
b. Customer Update\
c. Customer Create\
d. Invoice Issued
Once you’ve selected these, click **Save** to finalize the webhook setup.
8. To obtain the webhook secret in Maxio, hover over the selected site in the left navigation bar. When the popup menu appears, click **Edit Current Site** from the options.
9. You’ll be taken to the site-specific settings page. Locate the **Shared Key** section on this page, then copy the value provided. Paste this key into Sphere under the **Maxio Webhook Secret** field.
10. You’re all set! If the connection is successful, data will begin importing, and after some time, your products will appear in **Sphere**.
### Part 2: Configure Sphere Tax API Key for Tax Calculation
1. Click the **"Edit"** button on the Maxio integration card to make changes.
2. This will open a modal displaying the integration details. Click **"Generate API Key"** to create a new key.
3. Follow the steps to create a new API key. Make sure to store the newly generated key securely, as you won’t be able to view it again later.
**Note:** Sphere does not currently support tax calculation for Maxio transactions. Our team is actively working on integrating this functionality, and we appreciate your patience as we develop this feature. We will provide updates as soon as tax calculation support becomes available.
***
### Set up a connection between your Maxio test account and Sphere
To integrate your Maxio test site with Sphere, begin by selecting your test site from the list of available Maxio sites during the connection process. If you don’t have a test site yet, you can create a new one.
\
**Note:** Before continuing, please consult your Sphere representative to ensure your Sphere test account is correctly configured and meets your testing needs.
# Orb Integration
Integrating Orb with Sphere enables a.) seamless transaction data import and b.) live tax calculation within Orb invoices.
This guide provides step-by-step instructions on generating an API key in Orb, linking it to Sphere for a secure integration, and setting up a webhook connection between the two platforms.
It also covers configuring the Sphere Tax API within Orb to ensure accurate tax calculations.
### Part 1: Configure Data Synchronization from Orb to Sphere
**Note:** Ensure that the test mode flag is turned off in Orb and that you are in live mode.
1. In your Sphere account, click on the **Connect** button on the Orb tile.
2. In another window, open your Orb dashboard and navigate to the **Developers** tab. Click **API Keys**.
3. Click the **+ New API Key** button at the top.
4. A modal will appear allowing you to enter the **key name** and a **description**. Once finished, click **Create**.
5. A new key will be created. Be sure to save it, as you won’t be able to view it again.
6. Go back to your Sphere account and enter the API key generated in Step 4. Ensure there are no extra spaces before or after the value.
7. Click **Next** to complete the setup. A success message will confirm the connection. Next, you'll proceed with setting up the webhook. Copy the Orb Webhook URL.
8. Return to the **Orb Dashboard**, go to the **Developers** tab, and click **Webhooks**.
9. Click the **+ Add endpoint** button.
10. A modal will appear, prompting you to enter the **Endpoint URL** you copied from **Sphere** (Orb Webhook URL) in Step 7. Click **Add Endpoint**.
11. You will see the **Endpoint URL** successfully added to the list. Click the URL that was just added.
12. In the top right corner, expand the dropdown and click **View Signing Secret**.
13. Copy the **Signing Secret**. You will be pasting this value into **Sphere**.
14. Go back to the **Sphere dashboard**. In the **Orb Webhook Secret** input field, paste the **Signing Secret** copied in Part 13, then click **Done**.
15. You’re all set! If the connection is successful, data will begin importing, and after some time, your products will appear in **Sphere**.
### Part 2: Configure Sphere Tax API Key for Tax Calculation
1. Navigate to the settings in Orb and select the Integrations tab.
2. Locate Sphere tax in the Taxes section and click **"Connect Sphere"**.
3. In Sphere, click on "**Create a new API Key**" to generate the Sphere Tax API Key. Be sure to save the newly generated key, as it cannot be viewed again later.
4. Enter your Sphere Tax API Key into the text box and click **"Connect"**.
5. After completing the setup, the connection status will be set to **Active**.
***
### Set up a connection between your Orb test account and Sphere
To integrate your Orb test environment with Sphere, begin by enabling **test mode** in your Orb account. You can do this by toggling the switch located at the top of the Orb dashboard.
**Note:** Before proceeding, please check with your Sphere representative to confirm that your Sphere test account is properly set up and aligned with your testing requirements.
Once test mode is activated:
* A **green notification bar** will appear across the top of the Orb dashboard, indicating that you are operating within the test environment.
* All data and operations within this mode will remain isolated from your live/production Orb environment, ensuring a safe testing experience.
After test mode is enabled, you can proceed to connect Sphere by following the same steps outlined above for production setup.
For more information on using Orb’s test mode and environment setup, please refer to the official [Orb documentation](https://docs.withorb.com/quickstart/introduction).
# Rillet Integration
Integrating Rillet with Sphere enables a.) seamless transaction data import and b.) live tax calculation within Rillet invoices.
This guide provides step-by-step instructions on generating an API key in Rillet, linking it to Sphere for a secure integration.
It also covers configuring the Sphere Tax API within Rillet to ensure accurate tax calculations.
### Part 1: Configure Data Synchronization from Rillet to Sphere
**Prerequisite:**\
**Note:** Rillet authenticates API requests using API keys. To get started, reach out to the Rillet team to enable access. Once enabled, you can create and manage your API keys from the [Organization Settings](https://app.rillet.io/settings/api-access) page.
1. In your Sphere account, select the Rillet tile and click the “**Connect**” button.
2. A modal will appear — click the **“Get Started”** button to proceed.
3. Navigate to your **Organization Settings** by clicking on your Rillet account name in the bottom left corner, and then clicking **Organization Settings**. From there, navigate to the **API Access** section () and generate a new API key by clicking on Create New API Key. Make sure to **NOT** select the read-only box.
4. Go back to the Sphere app, paste the Rillet API key, and click **Next**.
5. Select the Rillet subsidiary you want to associate with your Sphere organization. NOTE: If you only have 1 entity in your Rillet account it will be automatically selected for you and this step will be skipped.
6. Copy the **Rillet webhook URL** from the screen below
7. In Rillet, navigate to **Organization Settings** > **Webhooks** () and click the **Create webhook** button.
1. Paste the URL from Step 6 to the URL field
2. Under **Entity**, select:
1. **Invoice**, and check the boxes for **Created**, **Updated**, **Deleted**, **Payment Updated**
2. Click **Add Entity** right below
3. Select the **Credit Memo** entity, and check**:** **Created**, **Updated**, **Deleted**, **Payment Updated**
3. Click '**Create**'
8. On the same page as the previous step, Click on the Webhook you just configured, and copy the '**Signing token**' into the **Rillet webook secret** field in the Sphere integration (in the page in Step 6)
9. You’re all set! If the connection is successful, data will begin importing, and after some time, your products will appear in **Sphere**.
### Tax Calculation in Rillet
1. Ensure all your 'Subscribed Regions' in Sphere have 'Tax Calculations' settings switched to Yes (see video [here](https://www.loom.com/share/6254e72b130c44808a59513046ee60ea?sid=463c87f3-0683-4622-a479-0f960620d332) on how to ensure this is done).
2. You can go ahead and create an invoice in Rillet for that region. After saving your changes, taxes will be added to the invoice by Sphere through an asynchronous process. This might take some time, so they may not appear immediately.
# QuickBooks Integration
Integrating QuickBooks with Sphere enables a) seamless import of transaction data and b) live tax calculation within QuickBooks transactions (invoices, credit memos and refund receipts).
This guide provides detailed, step-by-step instructions for connecting your QuickBooks account to Sphere using the secure OAUTH flow.
### Configure Data Synchronization from QuickBooks to Sphere
1. In your Sphere account, select the QuickBooks tile and click the “**Connect**” button.
2. You will be redirected to a QuickBooks OAUTH link, where you'll need to select the company to connect with Sphere. Please click Next after selecting the company.
3. After granting access, you'll be redirected back to Sphere, where you'll see that your QuickBooks account has been successfully connected.
4. You’re all set! If the connection is successful, data will begin importing, and after some time, your products will appear in **Sphere**.
### Tax Calculation in QuickBooks
### Pre-requisite for tax calculation in QuickBooks
1. Ensure that the Sales Tax feature is enabled in your QuickBooks account, as Sphere cannot apply taxes to your transactions without it. In the left navigation bar, search for **Taxes**, then click the **Sales Tax** settings button in the top-right corner.
2. Please make sure the Sales Tax option is enabled.
Note: If Sales Tax is disabled in your QuickBooks account, please reach out to your Sphere representative for assistance with enabling it.
### Next Steps
1. Ensure all your 'Subscribed Regions' in Sphere have 'Tax Calculations' settings switched to Yes (see video [here](https://www.loom.com/share/6254e72b130c44808a59513046ee60ea?sid=463c87f3-0683-4622-a479-0f960620d332) on how to ensure this is done).
2. You can create an invoice in QuickBooks for that region. After saving, refresh the page to see the taxes added to the invoice by Sphere. Since this process runs asynchronously, there may be a short delay before the taxes appear on the invoice.
### How to store Tax Ids in QuickBooks
Follow these steps to save the tax IDs linked to a customer in QuickBooks so Sphere can sync them.
1. Open the customer in QuickBooks and select **Edit**.
2. Click the **Edit Customer** button.
3. In the customer details, go to the **Additional Info** section and mark the customer as tax-exempt. This will reveal two fields: select **Other** as the exemption reason, and enter the tax ID in the **Exemption Details** field. Once complete, click **Save**.
# Salesbricks Integration
Integrating Salesbricks with Sphere enables a.) seamless transaction data import and b.) live tax calculation within Salesbricks invoices.
This guide provides step-by-step instructions on generating an API key in Salesbricks, linking it to Sphere for a secure integration.
It also covers configuring the Sphere Tax API within Salesbricks to ensure accurate tax calculations.
### Part 1: Configure Data Synchronization from Salesbricks to Sphere
1. In your Sphere account, select the **Salesbricks** tile and click the “**Connect**” button.
2. A modal will appear — click the **“Get Started”** button to proceed.
3. In your Salesbricks app, navigate to the **Settings** tab, then go to **Integrations**. Under the **Salesbricks Services** section, click the **APIs** button.
4. Generate a new API token and copy it to your clipboard.
5. Go back to the Sphere app, paste the Salesbricks API token, and click **Next**.
6. You’re all set! If the connection is successful, data will begin importing, and after some time, your products will appear in **Sphere**.
### Part 2: Configure Sphere Tax API Key for Tax Calculation
1. In Sphere, click **“Create a new API Key”** to generate the Sphere Tax API key. Make sure to save the newly generated key, as it cannot be viewed again later. You will need to enter this value in the Salesbricks dashboard.
2. Go to **Settings** in your Salesbricks account, click **Integrations**, and then under the **Billing and Payment** section, select **Sphere**.
3. Paste the **Sphere API key** into the input field on this page and click the **Validate** button.
4. Once the key is validated, the connection status will show as **Active**. You’re all set.
# Stripe Integration
Downloading Sphere's Stripe app enables a.) seamless transaction data import and b.) live tax calculation within Stripe Billing and Checkout products.
This guide provides step-by-step instructions on how to download Sphere's Stripe app and turn on live tax calculation within Stripe products.
### Part 1: Download Sphere's Stripe App
1. In your Sphere account click **Connect** on the Stripe tile.
2. You will be redirected to a new tab where you will be required to **select your Stripe account** that should be integrated with Sphere.
3. Select **Continue** to install Sphere's Stripe app.
4. If the connection is successful, you'll see a success message on screen and you'll be redirected back to the Sphere app.
### Part 2: Enable automatic tax calculation in your Stripe account
1. Ensure all your 'Subscribed Regions' in Sphere have 'Tax Calculations' settings switched to Yes (see video [here](https://www.loom.com/share/6254e72b130c44808a59513046ee60ea?sid=463c87f3-0683-4622-a479-0f960620d332) on how to ensure this is done).
2. Once you have the Stripe app installed (refer to Part 1), go to your Stripe Dashboard, click on the gear icon in the top right hand corner of your screen, click Tax, go to the Integrations tab and ensure that the automatic tax' toggle is switched on
3. Then navigate to the Advanced options tab and ensure your Tax calculation provider is set to Sphere
{% hint style="info" %}
Note: If you create invoices / subscriptions / checkout sessions via Stripe's API you must ensure that the `automatic_tax` parameter is set to `enabled` (more info [here](https://docs.stripe.com/api/subscriptions/create#create_subscription-automatic_tax)).
{% endhint %}
4. In the Business information tab, ensure your tax inclusive / exclusive pricing setting in Stripe is set to 'Automatic' (this ensures tax inclusive pricing in regions that require it, e.g. EU, UK etc).
5. Once all the above steps are complete, be sure to test out your existing billing flows and reach out to your Sphere representative if you have any issues or questions.
# Tabs Integration
Integrating Tabs with Sphere enables seamless transaction data import and live tax calculation within Tabs.
This guide provides step-by-step instructions on generating an API key in Tabs, linking it to Sphere for a secure integration.
It also covers configuring the Sphere Tax API within Tabs to ensure accurate tax calculations.\
\
**Testing:** To test the integration, we recommend connecting your Tabs sandbox tenant to a test Sphere organization to confirm. If you do not have Tabs sandbox tenant, please contact your Zuora account team to provision one.
### Part 1: Configure Data Synchronization from Tabs to Sphere
1. In your Sphere account, click on the Connect button on the Zuora tile.
2. In another window, open your Tabs account and navigate to **Developers** tab on the side navigation bar.
3. Click the **+ Add API Key** button on the top right of the screen. On the popup, fill out the fields:
1. **API Key Name** -> Description name of the API Key such as **Sphere Integration**
2. **Access Level** -> Reporter (read-only)
3. Click **Create API Key**
4. Click the **Copy** button to save the API Key to your clickboard and click **I've saved my key!**
5. Navigate back to your Sphere dashboard, and past the API Key into the Sphere integration and click **Next**
6. In order for us to track liability of your historical transactions, click the **Connect to Quickbooks** button
7. Click **Generate API Key** and copy the Sphere API Key for Part 2 below
### Part 2: Configure Sphere Tax API Key for Tax Calculation
In order to configure tax calculation in Tabs, you will need to setup a sales tax item in your ERP for Tabs to use. Please refer to Tabs' documentation to configure this:
1. Navigate back to your Tabs account, and select Integrations tab on the side navigation bar. Scroll down to the **Tax** section and click **Connect** on the Sphere integration
2. Copy the Sphere API Key saved in Part 1 and click **Connect**
3. Click **Edit** next to **Sales tax integration item**
4. Select the sales tax integration item from the drop down and click **Save**
# Xero Integration
Integrating Xero with Sphere enables a) seamless import of transaction data and b) live tax calculation within Xero invoices.
This guide provides detailed, step-by-step instructions for connecting your Xero account to Sphere using the secure OAUTH flow.
### Configure Data Synchronization from Xero to Sphere
1. In your Sphere account, select the **Xero** tile and click the “**Connect**” button.
2. You will be redirected to a Xero OAUTH authorization link, where you'll need to grant Sphere permission to connect to your Xero account.
3. After granting access, you'll be redirected back to Sphere, where you'll see that your Xero account has been successfully connected.
4. You’re all set! If the connection is successful, data will begin importing, and after some time, your products will appear in **Sphere**.
### Tax Calculation in Xero
1. Ensure all your 'Subscribed Regions' in Sphere have 'Tax Calculations' settings switched to Yes (see video [here](https://www.loom.com/share/6254e72b130c44808a59513046ee60ea?sid=463c87f3-0683-4622-a479-0f960620d332) on how to ensure this is done).
2. You can go ahead and create an invoice in Xero for that region. Once you've saved your changes, refreshing the page will show the taxes added to the Xero invoice by Sphere. Updating credit notes with taxes may take some time — up to 15 minutes at most.
### Set up a connection between your Xero sandbox account and Sphere
To integrate your Xero sandbox (test) environment with Sphere, it’s crucial to **select the sandbox organization** rather than the live organization during the OAuth connection process. This ensures that all data and interactions occur within the safe confines of your test environment without affecting your production data.
**Note:** Before proceeding, please check with your Sphere representative to confirm that your Sphere test account is properly set up and aligned with your testing requirements.
The connection process to Sphere is the same—simply follow the steps outlined above for the production setup.
# NetSuite Integration
Integrating NetSuite with Sphere enables:
* **Live tax calculation** within NetSuite invoices and credit memos via the SuiteTax plugin
* **Transaction data sync** from NetSuite into Sphere for filing and compliance
This guide walks through installing the Sphere SuiteApp, configuring tax calculation, and connecting your NetSuite account to Sphere.
***
### Prerequisites
Before installing, ensure the following features are enabled in your NetSuite account.
#### Enable SuiteCloud Features
Navigate to **Setup > Company > Enable Features**. In the **SuiteCloud** tab:
* Under **SuiteBuilder**: check **Custom Records**
* Under **SuiteScript**: check **Client SuiteScript** and **Server SuiteScript**
* Under **SuiteTalk (Web Services)**: check **REST Web Services**
* Under **Manage Authentication**: check **OAuth 2.0**
Click **Save**.
#### Enable SuiteTax
On the same **Enable Features** page, go to the **Tax** tab:
1. Check **SuiteTax**
2. Under **Related SuiteApps**, install:
* **SuiteTax Engine** — click Install
* **SuiteTax Data Records** — click Install
* **SuiteTax Reports** — click Install
3. Check **SuiteTax Plug-in**
4. Click **Save**
> **Important:** Enabling SuiteTax is permanent and cannot be reversed. If you see a Site Builder error, follow NetSuite's guides to [disable Site Builder](https://docs.oracle.com/en/cloud/saas/netsuite/ns-online-help/section_N2755498.html) and [inactivate websites](https://docs.oracle.com/en/cloud/saas/netsuite/ns-online-help/section_N2898498.html) first.
***
#### Confirm SuiteTax Setup
If your account has existing taxable transactions, NetSuite will migrate them to the SuiteTax format. After migration completes:
1. Navigate to **Setup > Tax > Confirm SuiteTax Setup** (or click the **Confirm SuiteTax Setup** button on the SuiteTax Migration page)
2. Check the **SuiteTax Setup Completed** checkbox
3. Click **Save**
> **Note:** Taxable transactions cannot be created or edited until this step is completed. This step may not appear on new accounts with no prior transactions.
***
### Installing the Sphere SuiteApp
Search for **SuiteApp Marketplace** in the NetSuite global search. In the marketplace, search for **Sphere Tax** and click Install.
The SuiteApp ID is `com.getsphere.spheretax`.
This installs:
* The tax calculation plugin script (`tax_calculation.js`)
* Sphere Configuration and Tax Code Mapping custom records
* A default sales tax item
* The Sphere Tax integration record
***
### Data Synchronization
To sync transaction data from NetSuite to Sphere for filing and compliance, connect your NetSuite account through the Sphere dashboard.
> **Supported transaction types:** Sphere currently syncs invoices and credit memos from NetSuite. Support for additional transaction types (cash sales, cash refunds, sales orders) is coming soon.
#### Connect NetSuite to Sphere
1. In the **Sphere dashboard**, navigate to **Settings > Integrations**
2. Select **NetSuite** and click **Connect**
3. Enter your **NetSuite Account ID** (found at Setup > Company > Company Information)
4. You will be redirected to NetSuite to authorize Sphere
5. After authorizing, you'll be redirected back to the Sphere dashboard
#### Select a Subsidiary
If your NetSuite account has multiple subsidiaries (OneWorld), you'll see a **Select Subsidiary** screen after connecting. Choose the subsidiary that represents the legal entity registered with the tax authority, then click **Continue**.
If your account has a single subsidiary, this step is handled automatically.
{% hint style="info" %}
Sphere scopes its transaction sync and tax calculations to a single subsidiary. Selecting the correct subsidiary ensures that only transactions belonging to that legal entity are imported, and that tax is calculated against the right jurisdictional registrations.
{% endhint %}
***
### Live Tax Calculation
> **Contact our team before enabling live tax calculation.** This section configures Sphere to calculate sales tax in real-time on NetSuite transactions. If you're only using Sphere for filing/compliance (data sync), you can skip this section.
#### Step 1: Create the Plugin Implementation Record
This step connects the installed script file to NetSuite's SuiteTax plugin framework. It must be done manually — this is a NetSuite platform limitation that affects all SuiteTax engine providers.
1. Navigate to **Customization > Plug-ins > Plug-In Implementations**
2. Click **New Plug-In Implementation**
3. For the script file, select `tax_calculation.js` from the SuiteApps folder: `SuiteApps / com.getsphere.spheretax / tax_calculation.js`
4. Click **Create Plug-In Implementation**
5. Fill in:
* **Name**: Sphere Tax
* **Status**: **Released** (not "Testing")
6. Verify the **Scripts** subtab shows `tax_calculation.js` in the **IMPLEMENTATION** field (should be auto-populated)
7. Click **Save**
> **Critical — Status must be "Released":** The default status is "Testing", which limits the plugin to the script owner only. All other users' transactions will silently skip tax calculation. Change to "Released" so the plugin runs for everyone.
#### Step 2: Enable the Plugin
1. Navigate to **Customization > Plug-ins > Manage Plug-ins**
2. Under **Tax Calculation**, check the box next to **Sphere Tax**
3. Uncheck **SuiteTax Engine** (NetSuite's built-in engine) if you want Sphere to handle all tax calculations
4. Click **Save**
#### Step 3: Add the Sphere API Key
Once you have a Sphere API key, navigate to the **API Secrets** page by typing in API Secrets in the NetSuite search bar, or via **Setup > Company > API Secrets**. Create a new API Secret to manage you Sphere API Key securely. Enter **Sphere API Key** as the name, **\_sphere\_tax\_api\_key** as the id, and enter your API key under the password field.
**API Secret Restrictions**
After entering the API key value in the **Details** tab, switch to the **Restrictions** tab and configure the following:
* Check **Available to SuiteApp**
* Set **SuiteApp ID** to `com.getsphere.spheretax`
* Check **Allow for All Scripts**
* Check **Allow for All Domains**
Click **Save**.
{% hint style="warning" %}
The SuiteApp ID must match exactly — `com.getsphere.spheretax`. Without this restriction, the Sphere Tax plugin will not be able to read the API key.
{% endhint %}
#### Step 4: Create Tax Infrastructure
SuiteTax requires a nexus, tax type, and tax code to route transactions to a tax engine. These records are just connectors — Sphere handles all jurisdiction logic, tax rates, and nexus determination internally. You only need one of each.
Note the **Internal ID** of each record — you'll enter them in the Sphere Configuration record in the next step. After saving each record, the Internal ID is visible in the page URL (e.g., `id=25` in `...taxitem.nl?id=25`).
**4a. Create a Nexus**
1. Navigate to **Setup > Tax > Nexuses > New**
2. Set **Country** to "United States"
3. Click **Save** and note the **Internal ID**
> If your account already has a nexus you'd like to use, you can skip this step and note its Internal ID instead.
**4b. Create a Tax Type**
1. Navigate to **Setup > Tax > Tax Types > New**
2. Set:
* **Country**: United States
* **Name**: Sphere Tax
3. In the **Nexus Accounts** subtab, add a line:
* **Nexus**: select the nexus from Step 4a
* **Payables Account**: your tax payables GL account (e.g., Accounts Payable)
* **Receivables Account**: your tax receivables GL account (e.g., Accounts Receivable)
4. Click **Save** and note the **Internal ID**
**4c. Create a Tax Code**
1. Navigate to **Setup > Tax > Tax Codes > New**
2. Set:
* **Name**: Sphere Tax
* **Tax Type**: select the tax type from Step 4b
* **Available On**: Both
3. Click **Save** and note the **Internal ID**
#### Step 5: Configure Sphere Settings
1. Search for **Sphere Configuration** in the global search, or navigate to **Lists > Custom > Sphere Configuration**
2. Click **New Sphere Configuration**
3. Set:
* **Payable Account** — the GL account for tax payables (auto-populated with a default)
* **Receivable Account** — the GL account for tax receivables (auto-populated with a default)
* **Nexus ID** — the Internal ID from Step 4a
* **Tax Type ID** — the Internal ID from Step 4b
* **Tax Code ID** — the Internal ID from Step 4c
4. Click **Save**
#### Step 6: Assign the Tax Engine to Subsidiaries
NetSuite needs to know which subsidiaries should use Sphere for tax calculation.
* Navigate to **Setup > Company > Subsidiaries** and edit the relevant subsidiary
Hit **Edit**, and navigate to the **Tax Registrations** tab. Once there:
* select **United States** as the **Country**
* select **United States** as the **Nexus**
* select **Sphere Tax** as the **Tax Engine**
* select **Today's Date** as the **Effective From**
and hit **Add.**
Follow the same process for any other subsidiaries you want to use Sphere Tax for.
#### Preview Taxes
Once you've set up the Sphere SuiteTax plug-in in NetSuite, and configured your product tax codes in Sphere, you're now set up to calculate taxes on your NetSuite Invoices and Credit Notes!
Clicking **Preview Tax** on an invoice will populate the box on the right hand side with appropriate tax information.
# Nue Integration
Integrating Nue with Sphere enables seamless transaction data import and live tax calculation within Nue.io quotes, orders, and invoices.
This guide provides step-by-step instructions on generating an API key in Nue, linking it to Sphere for a secure integration.
It also covers configuring the Sphere Tax API within Nue.io to ensure accurate tax calculations.\
\
**Note:** If you are attempting to connect to a Nue sandbox, you will need to use a corresponding Sphere test organization.
### Part 1: Configure Data Synchronization from Nue.io to Sphere
1. In the Sphere account, click on the Connect button on the Nue tile.
2. In another window, open your Nue.io dashboard and navigate to **System Settings** and click **API Keys**
3. Click the **+ New API Key** button and select the **System Administrator** assigned role
4. Once you click **Confirm** you will be able to see the API Key you created by clicking **Reveal**
5. Go back to your Sphere account and enter the API Key. Click **Next** to complete the data synchronization setup.
6. On the next step, you will be prompted to generate a Sphere API Key. Save this API Key for Part 2 below.
### Part 2: Configure Sphere Tax API Key for Tax Calculation
1. Navigate to **Settings → Roles** in Nue and ensure relevant admin roles have the **Sphere integration** permission enabled.
2. Navigate to Settings > Integration Overview > Sphere integration
1. Locate the **Sphere** card; it will display as **Not Connected** for a fresh tenant.
3. Click on the Wrench to open configuration panel or go directly to Settings > Sphere
4. You will land on the **Connect to Sphere Tax** panel, which prompts for the API key and offers **Test** and **Activate** buttons.
5. **Enter and test Sphere API key**
1. Paste the **Sphere API token** from Part 1 above into the token field
2. Click **Test**:
1. If the key is invalid, you’ll see an authentication error: “Integration authentication failed. Please verify API key.”
2. Fix and re‑test until the connection succeeds.
6. After a successful test, click **Activate.**
1. On success, the Sphere card status updates to **Connected/Active** and Nue will start routing tax calls to Sphere.
# PayPal Integration
Integrating PayPal with Sphere enables seamless ingestion of transaction data for **PayPal Checkout sales, payment reversals, and payment refunds**.
This guide provides step-by-step instructions on generating an API key in PayPal and linking it to Sphere for a secure integration.
Sphere does not currently support a direct live tax calculation integration with PayPal. Instead, we recommend using the [Sphere Tax Calc API](https://docs.getsphere.com/~/revisions/JeAvU6D68mrZkKZY8IsB/features/integrations/api/tax-calculation) to calculate tax for your PayPal transactions. Follow the instructions below to link customer address information between your Sphere Tax Calc API requests and your PayPal transactions.
**Note:** If you are connecting to a PayPal sandbox environment, you must use a corresponding Sphere test organization.
### Part 1: Configure Data Synchronization from PayPal to Sphere
1. In the Sphere account, click on the Connect button on the PayPal tile.
2. Create a PayPal App
1. In the PayPal Developer Console, navigate to Apps & Credentials in the sidebar.
2. Click Create App and enter a unique name to identify the Sphere integration.
3. After creating the app, PayPal will display the App Details, including the Client ID and Client Secret.
3. Connect PayPal to Sphere
1. Return to your Sphere account.
2. Enter the Client ID and Client Secret from the PayPal app you created above.
3. Currently, we only support a single product for your PayPal transactions. Select the product you'd like to associate with your PayPal transactions from the dropdown.
4. Click **Connect** to complete the data synchronization setup.
### Part 2: Configure Sphere Tax API for Tax Calculation
Please follow the guide here to use the [Sphere Tax API](https://docs.getsphere.com/~/revisions/JeAvU6D68mrZkKZY8IsB/features/integrations/api/tax-calculation) to calculate the tax to apply to your PayPal transactions.
To link customer address information to your PayPal transactions, we need a shared customer identifier across both your Sphere Tax API requests and your PayPal transactions. Please add your internal customer identifier to the `custom_id` field in your PayPal checkout requests and to the `customer_id` field in your Sphere Tax API requests.
# Sequence Integration
Integrating Sequence with Sphere enables seamless transaction data import and live tax calculation within Sequence.
This guide provides step-by-step instructions on generating an API key in Sequence, linking it to Sphere for a secure integration.
It also covers configuring the Sphere Tax API within Sequence to ensure accurate tax calculations.\
\
**Note:** If you are attempting to connect to a Sequence sandbox, you will need to use a corresponding Sphere test organization.
### Part 1: Configure Data Synchronization from Sequence to Sphere
1. In the Sphere account, click on the Connect button on the Sequence tile.
2. In another window, open your Sequence dashboard and navigate to **Settings** and click **API Keys**
3. Click the "+New key" button and copy the ID and Client Secret values
4. Go back to your Sphere dashboard and enter in the Client ID and Client Secret from above
5. On the next step, you will be prompted to generate a Sphere API Key. Save this API Key for Part 2 below.
### Part 2: Configure Sphere Tax API Key for Tax Calculation
1. Navigate to “Browse integrations”, locate Sphere in the Tax section, and click “Manage integration”
2. Enter the Sphere API key from Part 1 and click "Test credentials" to validate the key
3. Once the Sphere API Key is validated, click Save changes. Sequence will now start routing tax calls to Sphere.
# Zuora Integration
Integrating Zuora with Sphere enables seamless transaction data import and live tax calculation within Zuora.
This guide provides step-by-step instructions on generating an OAuth credentials in Zuora, linking it to Sphere for a secure integration.
It also covers configuring the Sphere Tax API within Zuora to ensure accurate tax calculations.\
\
**Testing:** To test the integration, we recommend connecting your Zuora sandbox tenant to a test Sphere organization to confirm. If you do not have Zuora sandbox tenant, please contact your Zuora account team to provision one.
### Part 1: Configure Data Synchronization from Zuora to Sphere
1. In your Sphere account, click on the Connect button on the Zuora tile.
2. In another window, open your Zuora tenant and navigate to **Administration Settings** by clicking the Zuora App Settings icon on the bottom left corner.
3. Select **Manage User Roles** and Create a API User Role using the permissions below, if one is not already available in your account.
4. Navigate back to Administrator Settings and select **Manage Users** and Click the **Add Single API User** button
5. Fill out the Required information such as First Name, Last Name, and Work Email and select the API Role created above for the Zuora Platform Role field.
6. Once the API User is created, click into the new user and enter in a name for an OAuth Client and click **Create**. Keep the pop up open with credentials for the step below.
7. Navigate back to your Sphere dashboard, and enter in the Client ID and Client Secret from the OAuth Client created in the field below.
1. For the Zuora environment dropdown, this will match the URL of your Zuora tenant
2. For example, if your Zuora tenant URL domain is `na.zuora.com`, select `rest.na.zuora.com`
8. Once the integration is connected, click Edit and Generate a new API Key to be used below.
### Part 2: Configure Sphere Tax API Key for Tax Calculation
1. Open your Zuora tenant and navigate to **Billing Settings** by clicking the Zuora App Settings icon on the bottom left corner.
2. Select **Set Up Tax Engine and Tax Date.** Click the **+ Setup New Tax Engine** button and select **Sphere**
3. Fill in the fields on this screen as listed below:
1. **Engine Name** -> Sphere
2. **Tax Calculation URL** -> `https://server.getsphere.com/tax_api/zuora/calculate_tax`
3. **Security Token** -> Paste the API Key generated in Part 1
4. **Company Code** -> Enter in your Sphere Organization Name
5. Under Request Templates, click the **Use Default Template** button
4. Navigate back to **Billing Settings** and select **Set Up Taxation Codes**
5. Click the **Add New Tax Code** button
6. Fill in the fields on this screen as listed below:
1. **Tax Code Name** -> Sphere Tax Code
2. **Tax Engine** -> Sphere
3. **External Company Code** -> Your Sphere Organization Name
4. Click **Save**
7. Click **Activate** under the **Action column** for the Sphere Tax Code created
# Filing & Remittance
Filing and Remittance allows you to fulfill your reporting and tax obligations to global tax authorities
{% embed url="" %}
Walkthrough of the Filings feature in Sphere
{% endembed %}
## Overview
Our Filing feature will generate returns for you and, once approved, we'll submit the data to the relevant tax authority.
Our Remittance feature ensures that the amount you owe in each return is sent to the relevant authority in question.
## **Filing**
Each region will have a specified filing frequency that will vary depending on the amount of volume you do in that region:
* Annual - usually denotes low volume and hence a large reporting periods
* Semi annual - this frequency is less common across regions but does appear in some US states
* Quarterly - most common along with Monthly
* Monthly - highest volume and hence shorter reporting requirements
Note that while you may start on one frequency, you may be moved to a more regular frequency as you grow.
The due date for a filing will vary by region but they are usually either on the 20th day after the end of the reporting period OR the last day of the month after the end of the reporting period.
Sphere will generate your filings ***two weeks before the alloted due date*** so that you have plenty of time to approve the return. When a filing is released it will appear in the Filings section of the Sphere app in the *Pending Filings* table.
Filings will also have a status assigned to them based on their standing:
Status
Description
Requires review and approval from the account owner before return can be submitted
Requires review / approval AND the due date for the return has already passed
Return has been reviewed / approved and is waiting on client for payment (note this is only relevant for international regions)
Return has been reviewed / approved and Sphere is processing your return with the tax authority
Return has been successfully submitted with the tax authority
Return has been successfully submitted with the tax authority but it was submitted after the due date
## **Remittance**
### :flag\_us: US
Sphere provides the ability to auto remit tax payments from the bank account of your choosing. You can submit these bank details in your Account Settings or send a bank letter to the Sphere team via your dedicated Slack channel
Account setting
### :earth\_americas: Rest of World
For international jurisdictions, Sphere currently provides all necessary wire details to be able to send tax payments to international tax authorities.
Remittance payment
We are currently working on an embedded tax remittance feature that will allow customers to send tax payments internationally directly through Sphere. This will be available by Q2 2025.
## **Carryforward**
Carryforward is the industry-standard way of handling net negative liabilities within a tax return. Rather than reporting a negative liability to the tax authorities, Sphere will "carry forward" that negative liability into a future return where it can offset a positive liability. There are two ways that carryforward adjustments can impact your liability within a return:
### Generated
When carryforward is generated, we remove a negative liability from the return (such as a refund or past period cancellation), which **increases** your overall liability for that filing period.
### Applied
When carryforward is applied, we include a negative liability from a previous return, which **decreases** your overall liability for that filing period.
# Reports
Sphere provides reports to help you review your tax data, prepare for filings, and reconcile with your billing systems.
Generate custom reports of your transaction and tax data across billing systems. Reports are available from the **Reports** page in Sphere.
### Available Reports
**Tax Liability Summary** — A bird's-eye view of gross sales, taxable sales, tax liability, and tax collected by region and period. This report is ideal for periods with large transaction volumes where transaction exports become unwieldy, and for updating your tax payable GL accounts.
**Filing Summary** — Tax filing and remittance summarized by region and period. This report additionally breaks out the discounts, bank charges, and transfer fees applicable to international remittances via Sphere.
**Transaction Export** — A detailed, line-item-level export of your transactions with tax calculations, jurisdiction breakdowns, and filing status. Filter by date range, region, transaction source, and status. See the full column reference → [Transaction Export](/features/reports/transaction-export)
Generated reports are available for download from the **Downloads** page.
# Transaction Export
The transaction export produces a CSV file with one row per **line item**, not one row per transaction. A transaction with 3 line items appears as 3 rows, each sharing the same transaction-level fields (dates, status, customer) but with distinct line item details and tax calculations.
When filters are applied, the export includes metadata rows at the top of the file showing the organization name, date range, and filter selections.
***
### Identity & Source
**Transaction ID** — The invoice number or identifier from your billing system (e.g., `INV-0042`). If no human-readable invoice number exists, the system's internal identifier is used instead (e.g., `in_1Abc123`).
**Customer Id** — The customer's identifier in your billing system (e.g., Stripe's `cus_xxx`).
**Customer Name** — The customer's name from their billing record. If no name is on file, their email address is shown instead.
**Source Transaction Type** — The transaction type as reported by your billing system. Common values include `invoice`, `credit_note`, `refund`, and `charge`. This is the billing provider's classification, not Sphere's — see **Tax Reporting Type** for Sphere's tax-specific classification.
**Line Item Id** — The billing system's identifier for this specific line item within the transaction.
**Transaction Status** — The status of the transaction in Sphere. Values include `paid`, `finalized`, `cancelled`, and `void`.
**Transaction Source** — The billing integration this transaction came from, such as `stripe`, `quickbooks`, `orb`, or `chargebee`.
***
### Region & Address
**Region** — The name of the tax jurisdiction Sphere assigned to this transaction (e.g., "California", "Ontario", "United Kingdom"). If Sphere could not determine a tax jurisdiction, this field is empty.
**Source-to Address** — The address Sphere used for tax determination, shown as a single comma-separated string. Depending on the integration and product type, this may be the customer's shipping address, billing address, or a normalized version thereof.
***
### Dates & Tax Reporting
**Transaction Finalized Date** — When the invoice was finalized or issued by the billing system.
**Transaction Paid Date** — When payment was received.
**Transaction Cancelled Date** — When the invoice was voided or cancelled.
**Transaction Marked Uncollectible Date** — When the invoice was written off as uncollectible (bad debt).
**Tax Reporting Date** — The date Sphere uses to assign this row to a filing period. This is not always the same as the finalized date:
| Scenario | Tax Reporting Date is |
| ------------------------------------------ | ---------------------------------------------------------------- |
| Normal sale | The finalized date |
| Refund or credit note | The finalized date of the refund itself |
| Cancellation or bad debt | The cancellation or marked uncollectible date |
| Credit note offsetting a cancelled invoice | The original invoice's cancellation or marked uncollectible date |
For example, if an invoice was finalized in January but cancelled in March, it appears as a `sale` in January's filing period (increasing tax liability) and as a `cancellation` in March's filing period (decreasing liability or creating a carryforward credit).
**Tax Reporting Type** — Sphere's classification of this row for tax filing purposes. Determines whether amounts are positive (revenue) or negative (reversal).
| Value | Direction | Meaning |
| ------------------------------- | --------- | -------------------------------------------------------------------------------------------------- |
| `sale` | Positive | Invoice finalized in the reporting period |
| `current_period_refund` | Negative | Credit note where both the refund and original invoice were finalized in the same reporting period |
| `past_period_refund` | Negative | Credit note finalized in this period, but the original invoice was in a prior period |
| `cancellation` | Negative | Invoice cancelled or marked uncollectible during this period |
| `cancelled_invoice_credit_note` | Positive | Credit note that offsets a cancelled invoice — counteracts the cancellation's negative amount |
A single transaction can appear in multiple reporting periods with different types. For example, a cancelled invoice shows as a `sale` in the period it was finalized, then as a `cancellation` in the period it was cancelled.
***
### Line Item & Product
**Line item Description** — The line item description from your billing system (e.g., "Pro Plan - Monthly", "Usage charges for API calls").
**Product Name** — The name of the product in Sphere linked to this line item.
**Product Tax Code** — The product tax code assigned in Sphere, which determines how the item is taxed. May include modifier codes separated by `/` (e.g., `10010/digital/recurring`).
***
### Tax Status
**Taxable** — Whether any portion of this line item was subject to tax. `True` if tax applies in at least one jurisdiction, `False` if fully exempt or non-taxable.
**Tax Exemption Reason** — Why tax was not charged on this line item. Common values include "Reverse Charge", "Exempt Product", and "Non Taxable Region". If multiple reasons apply, they are listed separated by commas. Empty when the line item is taxable.
**Tax ID Number Status** — The verification status of the customer's tax ID that was used for reverse charge exemption. Only populated when the transaction has a reverse charge exemption and the customer has a matching tax ID for the transaction's region. Possible values:
| Status | Meaning |
| ------------- | ---------------------------------------------------------------------------- |
| `verified` | Verified through a tax ID validation service (e.g., VIES) |
| `valid` | Passed format checks, but no validation service available to verify directly |
| `failed` | Failed verification with the validation service |
| `invalid` | Failed format checks |
| `unavailable` | Validation service was temporarily unreachable — treated as accepted |
| `unsupported` | Tax ID verification is not supported in this region |
**Tax ID Number** — The customer's tax identification number (e.g., a VAT number like `DE123456789`). Shown when the transaction has a reverse charge exemption and the customer has a matching tax ID for the transaction's country, regardless of verification status.
**Tax ID Added Date** — When the tax ID was added to Sphere.
***
### Amounts — Transaction Currency
All amounts reflect the line item level, not the full transaction. Refunds and credit notes appear as negative amounts.
**Transaction Currency** — The currency the transaction was originally conducted in (e.g., `usd`, `eur`, `gbp`).
**Transaction Total** — The line item amount before discounts and tax.
**Transaction Discount** — The discount applied to this line item.
**Gross Sales in Transaction Currency** — The line item amount after discounts but before tax. This is Transaction Total minus Transaction Discount.
**Taxable Sales in Transaction Currency** — The portion of the line item that was subject to tax. This may be less than Gross Sales if part of the line item is exempt.
**Tax Collected in Transaction Currency** — The tax amount actually charged to the customer by the billing provider.
**Tax Calculated in Transaction Currency** — The tax amount Sphere's tax engine computed for this line item. This may differ from Tax Collected if the billing provider applied a different rate than what Sphere calculated.
***
### Amounts — Filing Currency
When a transaction's currency differs from the tax jurisdiction's filing currency, these columns show the amounts converted at the applicable exchange rate. If the transaction currency and filing currency are the same, these values match the transaction currency amounts.
**Transaction Filing Currency** — The currency of the tax jurisdiction where this transaction is filed (e.g., `USD`, `GBP`, `CAD`).
**Filing Currency Exchange Rate** — The exchange rate used to convert from the transaction currency to the filing currency.
**Gross Sales in Filing Currency** — Gross Sales converted to the filing currency.
**Taxable Sales in Filing Currency** — Taxable Sales converted to the filing currency.
**Tax Collected in Filing Currency** — Tax Collected converted to the filing currency.
**Tax Calculated in Filing Currency** — Tax Calculated converted to the filing currency.
***
### Filing & Region Status
**Filing Status** — Whether this transaction has been included in a tax filing.
| Value | Meaning |
| ---------------- | ---------------------------------------------------- |
| `Filed` | Included in a submitted tax filing |
| `Pending filing` | Assigned to a filing that has not yet been submitted |
| `Not Filed` | Not yet included in any filing |
**Region Status** — Your organization's tax obligation status in this transaction's region at the time of the transaction.
| Value | Meaning |
| ------------ | ----------------------------------------------------------------------------------------------------------------------------- |
| `Pre-breach` | Your organization had not exceeded the economic and/or physical nexus threshold in this region at the time of the transaction |
| `Breached` | The nexus threshold had been exceeded, but you had not yet registered to collect tax |
| `Registered` | You were actively registered to collect tax in this region |
***
### Tax Breakout by Jurisdiction
The final 18 columns break down the tax by jurisdiction level. Each of the six jurisdiction levels has three columns: **Name**, **Tax Rate**, and **Tax Amount**.
The six levels are: **Country**, **State**, **County**, **City**, **District**, and **Transit Authority**.
For example, the Country columns are `Tax Breakout - Country Name`, `Tax Breakout - Country Tax Rate`, and `Tax Breakout - Country Tax Amount`. The same pattern applies to all six levels.
* **Name** — The jurisdiction name (e.g., "California", "New York City")
* **Tax Rate** — The tax rate applied at this level, shown as a percentage (e.g., `6.5` for 6.5%)
* **Tax Amount** — The tax amount charged at this level
If no tax applies at a given level, those columns are empty. A transaction taxed only at the state level would have values in the State columns and empty Country, County, City, District, and Transit Authority columns.
# Policies
Details on the policies used at Sphere across our Monitoring, Registration, Calculation, Filing and Remittance features.
### **Refunds & Bad Debts**
Where there is no explicit entry for refunds / bad debts on a region's return, and the sum of refunds / bad debts is greater than the total sales in that region for the period, Sphere will carry over the total refunds / bad debts to be drawn down against sales in a subsequent period. For regions that report down to a locality level, these carryovers will be specific to the locality in question (i.e. will not be used against sales in other localities)
### Tax ID Validation
When tax IDs are provided (either automatically via your billing or via manual input), Sphere will not be able to change the taxability outcome of any transactions that were part of historically submitted returns. However, if a tax ID is provided for a customer after the transaction occurs, and that transaction hasn't formed part of a submitted return (i.e. it's within the same period), then the taxability outcome can and will be retroactively changed.
### New Region Set Up
You can find our list of live regions [here](https://www.getsphere.com/live-coverage).
We launch local rails in each region that we provide coverage in so that we can automate registration, calculation, filing and remittance end-to-end.
The way we determine where to launch next is based on customer demand and follows the below steps:
1. Sphere assesses requests from customers for specific regions on an ongoing basis.
2. Once a region is added to our roadmap, we start establishing local rails in that region in conjunction with a local advisor.
3. Timelines on setup vary by region requirements. E.g. if a region has online registration and filing and requires no local representative, go-live can be achieved in \~2 weeks from approval. If the region requires a local representative, go-live is usually 3-4 weeks.
4. Once local rails are established, registration, calculation, filing and remittance for that region is made available to all Sphere customers.
To request a region, please contact your dedicated Sphere representative via your Slack channel.
### Geolocation
Sphere geolocates input addresses using widely used geolocation services. Those services perform their address resolution using their own proprietary algorithms, which Sphere cannot directly control. Although rare, this can lead to some situations where a malformed address is geolocated to a jurisdiction unexpectedly. To avoid these types of situations Sphere encourages merchants to collect as much structured address data from their customers, to ensure geolocation succeeds.
### Region-specific policies
#### India
* **Region categorization** - where there is a lack of data provided by the customer to accurately assign a state / locality to a particular transaction, it will be allocated to an 'Other' category for the purposes of filing.
* **GSTIN reporting limitations** - due to technical limitations associated with the India GST portal, we are only able to input 500 GSTINs per return / period. Any additional GSTINs collected on B2B transactions (over and above the 500 that are able to be included in the return) will not be reported.
# FAQ
Find key information to ensure a smooth and efficient onboarding experience with Sphere. For further assistance, our support team is available to help.
### Onboarding
I have multiple billing providers - should I connect them all?
You should connect the billings system that is your source of truth for invoices / transaction history. You may have multiple sources of truth (e.g. invoicing for self serve vs invoicing for enterprise), in which case, you should connect both systems. Please be sure that there is no duplicate invoices across systems otherwise this will lead to double counting of transactions in your exposure analysis.
What are the permissions granted to Sphere?
Sphere is granted a number of 'read-only' permissions that allows us to extract all relevant transaction history to accurately analyze your global tax exposure. We are also granted 'write' permissions which are used if you use us for real-time tax calculation. This allows us to push the relevant tax into your invoices / at checkout in real-time.
What data do you access from our HRIS system?
We access employee name, status and work address data so that we can accurately analyze your physical presence across tax jurisdictions
What should I do if my payroll provider is not supported?
If your payroll provider is not supported, you can provide us with an export of your employee data which we can upload into your account. You need to provide us with employee name / ID, work address, start date, status (active, not active) and employee type (FTE, contractor). You can send this to us via email or your shared slack channel.
Can I do this later?
We recommend you do this now as you need to assign product tax codes to a.) accurately analyze your global tax exposure and b.) to calculte tax on invoices / at checkout. If you're unsure about what code to apply to a product, you can come back to it later.
I see many different products being listed!
This is likely due to your billing provider creating one-off products for each of your customers. Note that once you assign a tax code to one product, you can bulk apply that code to other products OR you can use a default tax code to apply one code to all products (this is only recommended if you have ONE product). Reach out to a Sphere representative via email or your shared slack channel if you still need assistance.
What is the default tax code?
The default tax code allows you to apply one product tax code to all your products. This is only recommended if you have ONE product. Different categories are taxed very differently so setting a default can be risky in this case.
# Brand Assets
Download official, high-quality Sphere logos in SVG and other key formats
{% hint style="warning" %}
**Logo Usage Guidelines**
To ensure consistency and proper representation of our brand, please follow these guidelines when using the Sphere logo:
* **Color Integrity:** Use only the official Sphere brand colors. Do not alter the logo's colors.
* **Uniform Scaling:** Always scale the logo proportionally. Do not stretch, compress, or distort its dimensions.
* **Legibility and Clear Space:**
* Ensure the logo is always legible. Choose a size appropriate for its application.
* Maintain a minimum clear space around the logo, free of other text or graphics, to ensure its visibility and impact.
* **Orientation:** Do not skew, rotate, tilt, or flip the logo.
{% endhint %}